In the last lesson of this series we went through the basic setup of a blog with pagination, taxonomies, and the typical index and single page views that are familiar to WordPress users.
If you haven’t read part 1 or part 2 of this series yet, be sure to check out those first. In part 1, we build the basic blog functionality with an index and single page. In part 2, we add pagination and support for the tags taxonomy.
Now we are going to step away from the concept of the sample blog, and focus on working with custom post types. To do this, we’ll create a simple mock real estate listing page with a “properties” custom post type. We’ll then add custom fields through ACF like square footage, price, and location.
Obviously this doesn’t exactly fit in with the rest of our blog, but it is for demonstration purposes, so let’s pretend it does for the sake of learning some new techniques!
Setting up our custom post type in WordPress
Before we jump into Astro, let’s get things set up in our WordPress instance. We’ll use the latest version of ACF to register a custom post type and add fields all from the admin.
I’m calling my CPT “properties/property” and keeping almost all the defaults. I am expanding the advanced settings to turn off the editor for the this post type though, since we’ll be focusing on custom fields instead.
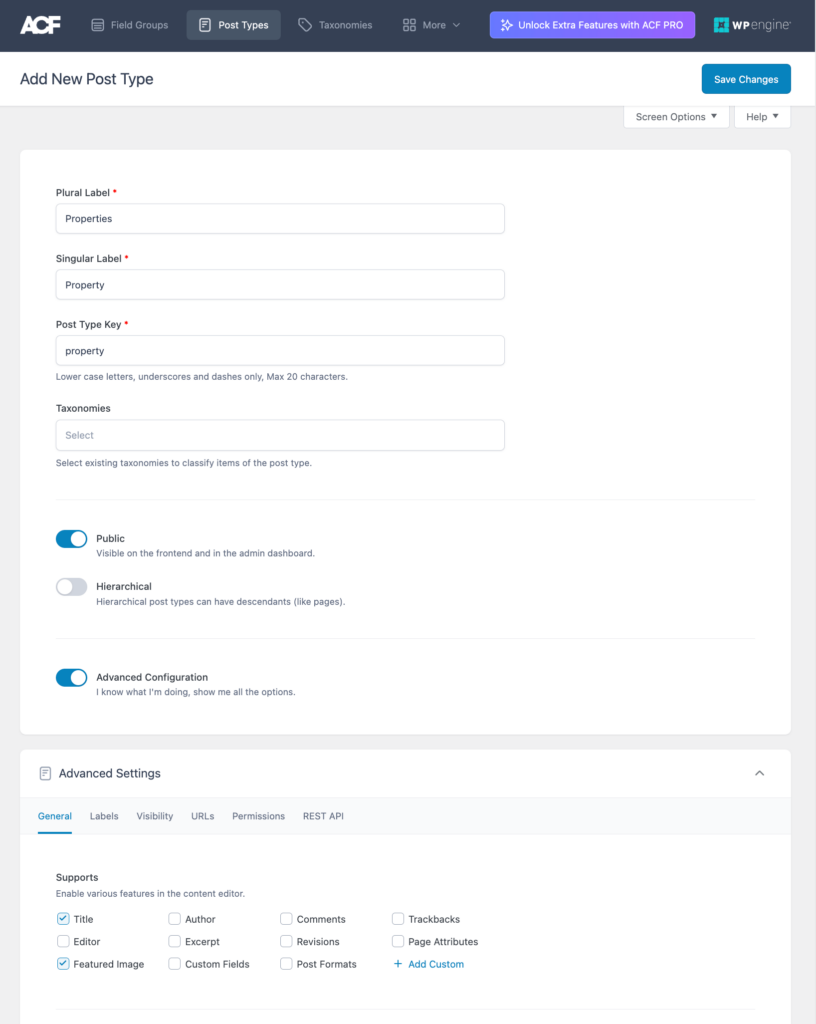
Go ahead and create the post type, and then click the “Add fields” button to set up your fields.
For an actual real estate website, this post type would likely have a dozen or more fields, but let’s keep things relatively simple and just add a few to work with:
- Square Footage – Number
- Price – Number
- Latitude – Text
- Longitude – Text
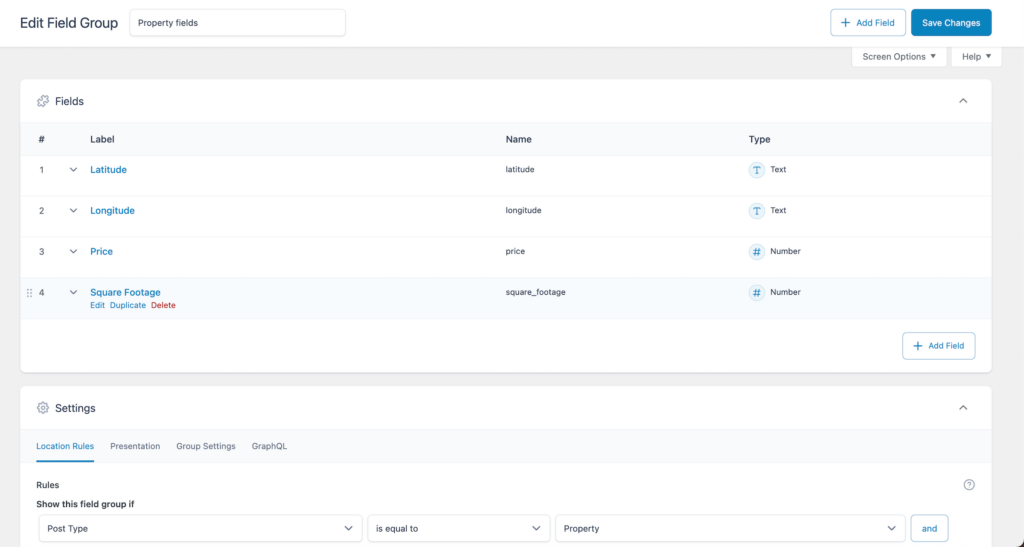
We’ll use the title field as the address for our listing and the built-in featured image for a photo.
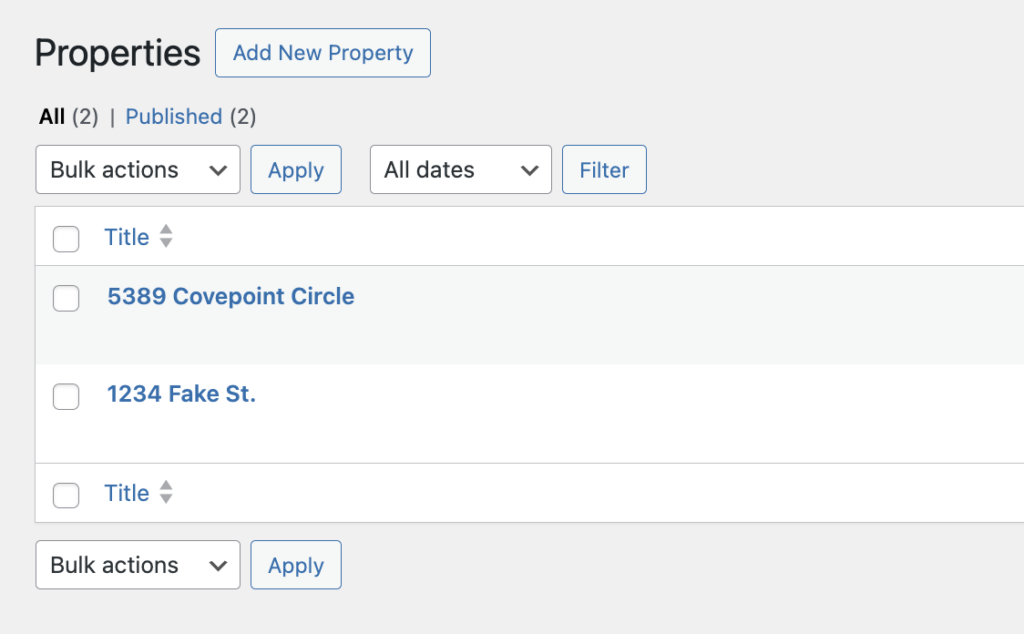
Now go ahead and create a couple listings manually. This way you’ll have some data to work with as we start using Astro and GraphQl.
Setting up our Astro template
Let’s jump into Astro and create our template before we attempt to use GraphQL with actual data.
Create a “properties” directory inside your src folder and add an index.astro file inside of it.
Go ahead and just add some text like “This is the properties page”, so you can tell it’s working.
While we’re here let’s add a link to this page in the navigation bar. That way we can quickly access it while we are building the page out.
---
import {getAllTags} from "../lib/client"

const tags = await getAllTags()
---

<header class="bg-slate-400 py-5 px-10 text-center">
  <div class="container mx-auto flex justify-between items-center">
    <a class="text-lg font-bold inline-block bg-slate-700 text-white py-4 px-8 rounded-md" href="/">Astro + WP</a>
    <div class="flex items-center gap-8">

      <a class="font-bold hover:underline" href={`/properties`}>Properties</a>

      {tags.map(tag => (
        <a class="font-bold hover:underline" href={`/tags/${tag.slug}`}>{tag.name}</a>
      ))}

    </div>
  </div>
</header>
Great. We’ll add the single template in a little bit, but for now let’s try wiring this up to our WordPress instance.
Adding our fields to GraphQL
If you navigate to our GraphQL explorer and try to start creating a query, you’ll notice our custom fields are nowhere to be found!
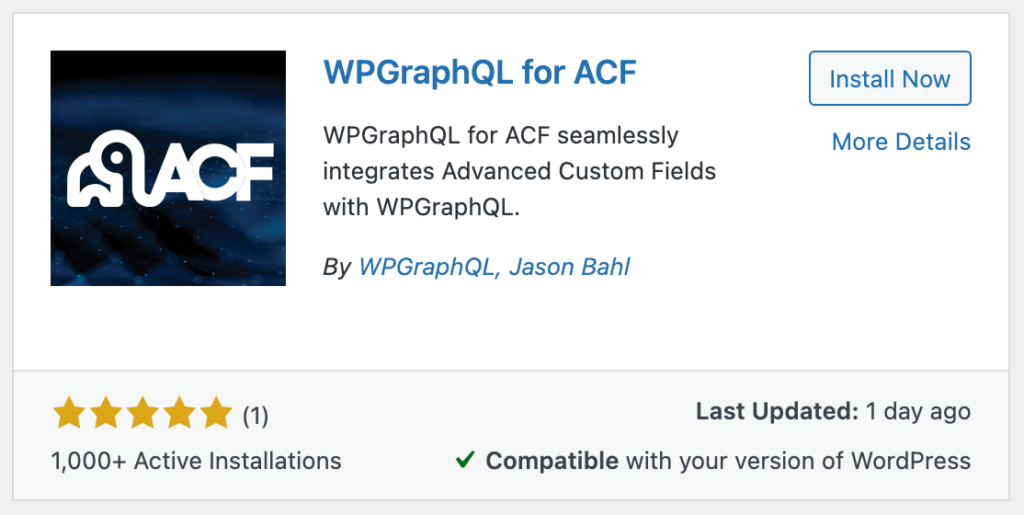
We have to do a little extra work to have them included in our GraphQL setup. There is a great simple plugin that works as a bridge between ACF and GraphQL aptly named “WPGraphQL for ACF”.
Go ahead and search for this plugin and install it on your site.
Once installed, we can go back to ACF and go to “Post Types” and open up the settings for our property post type. If you scroll down to the advanced settings you’ll now notice a “GraphQL” section where we can enable GraphQL. You can also add a custom name for the endpoint, but we’ll stick with the defaults.

Now, when we go back to the GraphQL explorer, you should see our custom property post type and an option for including the custom fields in our response!

It’s good practice to build out these queries manually, but below is the code that I will use from the query builder to fetch all the property posts. Go ahead and add this code to your lib/client.js file:
export const getAllProperties = async () => {
  const response = await fetch(API_BASE_URL, {
    method: 'POST',
    headers: {'Content-Type':'application/json'},
    body: JSON.stringify({
      query: `
        query AllProperties {
          properties {
            nodes {
              propertyFields {
                latitude
                longitude
                price
                squareFootage
              }
              title(format: RENDERED)
              slug
              featuredImage {
                node {
                  sourceUrl
                }
              }
            }
          }
        }
      `
    })
  })

  const { data } = await response.json();

  const properties = data.properties.nodes

  return properties
}
Building our property index template
Now we can use this function in our template to fetch all the properties and display them in a grid. This tutorial isn’t really focused on the HTML templating, so I won’t spend too much time on it.
In our front matter we can grab all the properties and then loop through them in our template:
---
import { Image } from "astro:assets";
import Layout from "../../components/Layout.astro";
import {getAllProperties} from "../../lib/client"

const properties = await getAllProperties();
---

<Layout>

  <div class="bg-slate-200 rounded-lg py-12">
		<h1 class="text-center text-3xl">Properties for sale</h1>
	</div>

	<div class="flex flex-wrap pt-5 -mx-2.5">
    {properties.map(property => (
      <div class="lg:w-1/3 px-2.5 mb-5">
  <article class="rounded-lg bg-white shadow-lg p-5 h-full flex flex-col items-start justify-between">
    <div>
      <Image class="w-full object-cover aspect-2/3 mb-5" alt="" src={property.featuredImage.node.sourceUrl} width={600} height={400} />
      <div class="mb-6 flex items-end justify-between">
        <h2 class="text-xl font-bold">{property.title}</h2>
        <p>${new Intl.NumberFormat('en-US').format(property.propertyFields.price)}</p>
      </div>
    </div>
    <a class="inline-block bg-slate-600 text-white rounded-md px-6 py-3 hover:bg-slate-500" href={`/properties/${property.slug}`}>View Property</a>
  </article>
</div>
    ))}
	</div>

</Layout>
You’ll see we can access our custom fields on the property.propertyFields object. If you have a ton of custom fields you may want to map through and attach them straight to the property or put them under another alias for ease of use.
We can use any javascript to help transform the data as well. For the price, I am using Intl.NumberFormat to get a nicely formatted price from the number field.
Awesome. If you check the front end of the site now you should see the properties coming through.
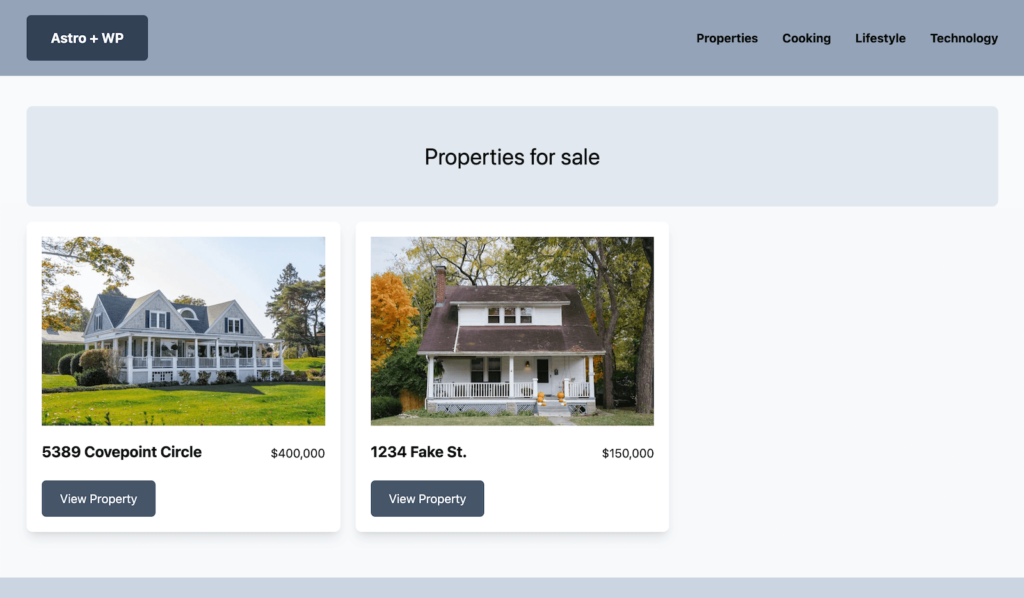
For practice let’s refactor this to be a bit cleaner. We can pull all the code that is inside the loop into a “PropertyCard” component. Within this component we’ll accept the property to render and destructure it from Astro.props:
---
import { Image } from "astro:assets";
const {property} = Astro.props
---

<div class="lg:w-1/3 px-2.5 mb-5">
  <article class="rounded-lg bg-white shadow-lg p-5 h-full flex flex-col items-start justify-between">
    <div>
      <Image class="w-full object-cover aspect-2/3 mb-5" alt="" src={property.featuredImage.node.sourceUrl} width={600} height={400} />
      <div class="mb-6 flex items-end justify-between">
        <h2 class="text-xl font-bold">{property.title}</h2>
        <p>${new Intl.NumberFormat('en-US').format(property.propertyFields.price)}</p>
      </div>
    </div>
    <a class="inline-block bg-slate-600 text-white rounded-md px-6 py-3 hover:bg-slate-500" href={`/properties/${property.slug}`}>View Property</a>
  </article>
</div>
Now back in our main index.js template file we can import and use this component passing in the property. This makes our main file much cleaner:
---
import Layout from "../../components/Layout.astro";
import PropertyCard from "../../components/PropertyCard.astro";
import {getAllProperties} from "../../lib/client"

const properties = await getAllProperties();
---

<Layout>

  <div class="bg-slate-200 rounded-lg py-12">
		<h1 class="text-center text-3xl">Properties for sale</h1>
	</div>

	<div class="flex flex-wrap pt-5 -mx-2.5">
    {properties.map(property => (
      <PropertyCard property={property} />
    ))}
	</div>

</Layout>
Check the front end of your site to make sure everything is still displaying correctly. If so, we can now move forward to creating our single property queries and template.
Building out our single property page
For the single property page, we need to follow a similar pattern as for our single blog post template.
We have to first grab all the possible slugs of our properties, so that Astro knows what all our property urls will be and can generate the associated pages. Then, for each page we’ll grab the individual page details and render it.
Again, I recommend experimenting in the GraphQL builder (there are several ways to accomplish this), but I’ll share the queries I’m going to use below:
export const getAllPropertySlugs = async () => {
  const response = await fetch(API_BASE_URL, {
    method: 'POST',
    headers: {'Content-Type':'application/json'},
    body: JSON.stringify({
      query: `
        query AllProperties {
          properties {
            nodes {
              slug
            }
          }
        }
      `
    })
  })

  const { data } = await response.json();

  const properties = data.properties.nodes

  return properties
}
export const getSinglePropertyBySlug = async (slug) => {
const response = await fetch(API_BASE_URL,
{
method: 'POST',
headers: {'Content-Type':'application/json'},
body: JSON.stringify({
query: `
query propertyBySlug {
propertyBy(slug: "${slug}") {
propertyFields {
latitude
longitude
price
squareFootage
}
title(format: RENDERED)
featuredImage {
node {
sourceUrl
}
}
}
}
`
}),
});
// destructure data from our JSON
const { data } = await response.json();
return data.propertyBy
}We can go ahead and drop both of these into our lib/client.js file.
Building our single template
Inside our properties directory we can now create a [slug].js file to display the individual property template.
We can copy and paste our getStaticPaths function from our single post template with just a few tweaks. Then, below we can grab the actual data for each post that we’ll use in our template:
---
import { Image } from "astro:assets";
import Layout from "../../components/Layout.astro";
import {getSinglePropertyBySlug, getAllPropertySlugs} from "../../lib/client"

// Build the paths for each of our properties
export async function getStaticPaths() {

  const slugs = await getAllPropertySlugs()

  // transform our array of {slug: "property-slug"} objects into an array of {params: {slug: "property-slug"}}
  const paths = slugs.map(slug => {
    return {params: slug}
  })

  return paths
}

// Fetch the single property we landed on
const { slug } = Astro.params;

//  assign the property info to property variable for usability
const property = await getSinglePropertyBySlug(slug)

---

// template will go here...
Finally, you can paste in the following HTML code for our single template. I won’t go over all the details since this is pretty straightforward HTML and TailwindCSS. Once again, we can access our custom fields by using property.propertyFields.
// All our imports and javascript logic above...
---

<Layout>

  <article class="max-w-screen-md mx-auto">

    <div class="grid grid-cols-2 gap-8">
      <div>
        <Image class="w-full object-cover mb-5" alt="" src={property.featuredImage.node.sourceUrl} width={1500} height={1000} />
      </div>
      <div>
        <h1 class="text-2xl py-8 font-bold">{property.title}</h1>
        <table class="w-full table-auto border-collapse border-t border-slate-600">
          <tbody>
            <tr>
              <td class="border-b border-slate-600 py-4 font-bold">Price:</td>
              <td class="border-b border-slate-600 text-right">${new Intl.NumberFormat('en-US').format(property.propertyFields.price)}</td>
            </tr>
            <tr>
              <td class="border-b border-slate-600 py-4 font-bold">Square Footage:</td>
              <td class="border-b border-slate-600 text-right">{property.propertyFields.squareFootage} ft<sup>2</sup></td>
            </tr>
          </tbody>
        </table>
      </div>

    </div>

    <div class="w-full h-[400px] bg-slate-300 flex justify-center items-center">
      [MAP PLACEHOLDER]
    </div>

  </article>

</Layout>
You will notice that there is a placeholder for a map right now. We are going to render the map using the latitude and longitude fields in the next step.
Go ahead and check the front end of your site. You should be able to click the “view property” button on your property cards and get to our new single property page!

If you run into 404 errors, be sure to double check your getStaticPaths method – as this determines the urls that will be served as pages.
Enjoying the read?
Join 500+ developers and learn modern WordPress, JAMStack, and javascript frameworks with a monthly development newsletter geared towards agencies and freelancers.
Adding a map to our single property page
So far we’ve just done some pretty basic outputting of fields to the front end. With our latitude and longitude though, we’ll use it to render a map with some javascript.
I’m going to use the Leaflet library for this as it is a free way to add maps to your site that doesn’t require setting up any account or API keys, but you could also use MapBox, Google Maps, etc.
If you check Leaflet’s documentation, you’ll notice it requires a css and javascript file. To start off I’m going to add the required CSS from a CDN to our layout.astro file in the head:
---
import Footer from "./Footer.astro";
import Header from "./Header.astro";
---

<html lang="en">
	<head>
		<meta charset="utf-8" />
		<link rel="icon" type="image/svg+xml" href="/favicon.svg" />
		<meta name="viewport" content="width=device-width" />
		<meta name="generator" content={Astro.generator} />
		<title>Astro + WP</title>
		<link rel="stylesheet" href="https://unpkg.com/leaflet@1.9.4/dist/leaflet.css"
		integrity="sha256-p4NxAoJBhIIN+hmNHrzRCf9tD/miZyoHS5obTRR9BMY="
		crossorigin=""/>

	</head>
	<body>
    <Header />
		<main class="bg-slate-50 py-10 px-4">
			<div class="container mx-auto">

        <slot />

      </div>
    </main>
    <Footer />
  </body>
</html>
Next, I’ll install Leaflet using npm – you could get the JS from a CDN as well, but I like keeping all my javascript managed by npm personally. Run npm i leaflet in your project terminal to install it.
Now let’s make a component for our map to keep the logic isolated and clean.
Before adding the javascript, this will be a super simple component. We are going to have it accept a “lat” and “lng” prop that we’ll pass in from our custom fields, and then we will render a div and attach these as data attributes.
---
const {lat, lng} = Astro.props
---

<div
id="map"
style="height: 400px; width: 100%;"
data-lat={lat}
data-lng={lng}
></div>
Leaflet requires the target div for a map to have a set height. I am just doing that with inline styles here for simplicity.
Before we continue, a quick reminder about how Astro works:
We’ve been writing a lot of javascript in between the triple dashes of our components, so you may be tempted to go ahead and try to instantiate the leaflet map there as well. This will not work, because the javascript in between these dividers runs ONLY on the server for generating our pages. For Leaflet, we want to run some javascript on the client within the browser.
In order to do this we can simply add script tags to our component and insert our javascript in between:
---
const {lat, lng} = Astro.props
---
<div
id="map"
style="height: 400px; width: 100%;"
data-lat={lat}
data-lng={lng}
></div>
<script>
import L from 'leaflet'
const mapElement = document.getElementById('map');
const lat = mapElement?.dataset.lat
const lng = mapElement?.dataset.lng
const zoomLevel = 13
const map = L.map(mapElement).setView([lat, lng], zoomLevel);
L.tileLayer('https://tile.openstreetmap.org/{z}/{x}/{y}.png', {
maxZoom: 19,
attribution: '© <a href="http://www.openstreetmap.org/copyright">OpenStreetMap</a>'
}).addTo(map);
const marker = L.marker([lat, lng]).addTo(map);
</script>This javascript is pulled directly from Leaflet’s documentation, with the addition of grabbing our “lat” and “lng” properties off the data attributes we defined.
At this point our component is read to go!
Let’s drop it into our template for our single property pages:
---
import { Image } from "astro:assets";
import Layout from "../../components/Layout.astro";
import {getSinglePropertyBySlug, getAllPropertySlugs} from "../../lib/client"
import Map from "../../components/Map.astro";

// Build the paths for each of our properties
export async function getStaticPaths() {

  const slugs = await getAllPropertySlugs()

  // transform our array of {slug: "property-slug"} objects into an array of {params: {slug: "property-slug"}}
  const paths = slugs.map(slug => {
    return {params: slug}
  })

  return paths
}

// Fetch the single property we landed on
const { slug } = Astro.params;

//  assign the property info to property variable for usability
const property = await getSinglePropertyBySlug(slug)
---

<Layout>

  <article class="max-w-screen-md mx-auto">

    <div class="grid grid-cols-2 gap-8">
      <div>
        <Image class="w-full object-cover mb-5" alt="" src={property.featuredImage.node.sourceUrl} width={1500} height={1000} />
      </div>
      <div>
        <h1 class="text-2xl py-8 font-bold">{property.title}</h1>
        <table class="w-full table-auto border-collapse border-t border-slate-600">
          <tbody>
            <tr>
              <td class="border-b border-slate-600 py-4 font-bold">Price:</td>
              <td class="border-b border-slate-600 text-right">${new Intl.NumberFormat('en-US').format(property.propertyFields.price)}</td>
            </tr>
            <tr>
              <td class="border-b border-slate-600 py-4 font-bold">Square Footage:</td>
              <td class="border-b border-slate-600 text-right">{property.propertyFields.squareFootage} ft<sup>2</sup></td>
            </tr>
          </tbody>
        </table>
      </div>

    </div>

    <Map lat={property.propertyFields.latitude} lng={property.propertyFields.longitude}/>

  </article>

</Layout>
Perfect, we can just drop it in and pass values for “lat” and “lng” using the same property.propertyFields we’ve been using to access our custom fields.
If you check the front end of the site you should now see a map getting rendered with a marker showing the property location!
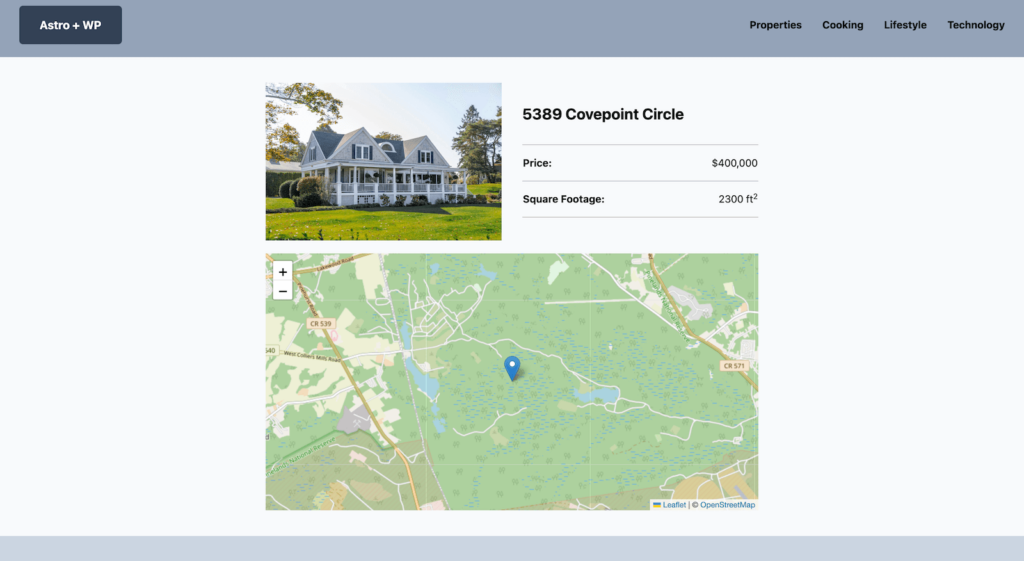
Leaflet has a bunch of other options you can explore as well, like adding a popup with additional information to markers.
Closing thoughts
In this third installment we’ve covered some really important topics that open up the possibilities with Astro and headless WordPress.
Using this same technique you could easily create any kind of custom post type and handle the data dynamically in Astro. I encourage you to play around with this and take it further with additional custom field types (like the repeater field or image/link fields) to explore how to use these in a headless setting.
You also now know how to use client side javascript in your components. This is actually a fairly complex topic as Astro allows you to manage javascript a bunch of different ways. I’d recommend looking at this page in the documentation for more information as well.
I hope you’ve enjoyed this series, and as always feel free to reach out if there was something you wanted to learn that was not covered in this demo project.
