Welcome to part 2 of this series of building a headless site with WordPress and Astro.
In this section, we’ll add pagination to our blog’s index page, create a reusable “Card” component, and then add support for tags – with each having a dedicated archive page.
This will bring us a lot closer to a full-featured blog. Let’s jump right in and get building!
If you haven’t read part 1 yet, be sure to check that first. In part 1, we build the basic blog functionality with an index and single page. You can find it here.
Adding pagination to our Astro blog
To add pagination, we’ll be working on the front end of our site in our Astro set up.
The way Astro handles pagination is similar to how dynamic routes are handled. First we will change the name of our index.astro file to [...page].astro. This might look a little funky, but it allows Astro to generate pages at /, /2/, /3/, etc… for paginating the blog.
Next, we’ll modify the function where we are currently fetching all our posts. We are going to move that whole query into a getStaticPaths function:
---
import Card from "../components/Card.astro";
import Layout from "../components/Layout.astro";
import {API_BASE_URL} from "../constants"

// Astro passes getStaticPaths {paginate} function as destructured argument
export async function getStaticPaths({paginate}) {
  const response = await fetch(API_BASE_URL,
  {
    method: 'POST',
    headers: {'Content-Type':'application/json'},
    body: JSON.stringify({
      query: `
				query IndexPage {
					posts(where: {orderby: {field: DATE, order: DESC}}) {
						nodes {
							slug
							date
							title
							excerpt
							featuredImage {
								node {
									sourceUrl
								}
							}
						}
					}
				}
      `
    }),
  });

	// destructure data from our JSON
	const { data } = await response.json();

	//  assign the array of nodes to "posts" variable for usability
	const posts = data.posts.nodes

	// use pagination function to generate all our pages
	return paginate(posts, {pageSize: 3})
}


// All pagination data is passed through the "page" prop
const { page } = Astro.props;

// Paginated entries are on page.data - we re-assign to posts for convenience
const posts = page.data

---
//.... our html markup
Here is where things get interesting. Astro provides a paginate method that we can destructure and pass as an argument to the getStaticPaths function.
After we get our array of posts we return a call to this function with the desired page size passed in as well paginate(posts, {pageSize: 3}).
What happens behind the scenes is Astro will generate pages for each page, and pass in the pagination data including the correct posts for page 1,2,3 etc as well as links for next/previous through a prop called “page”.
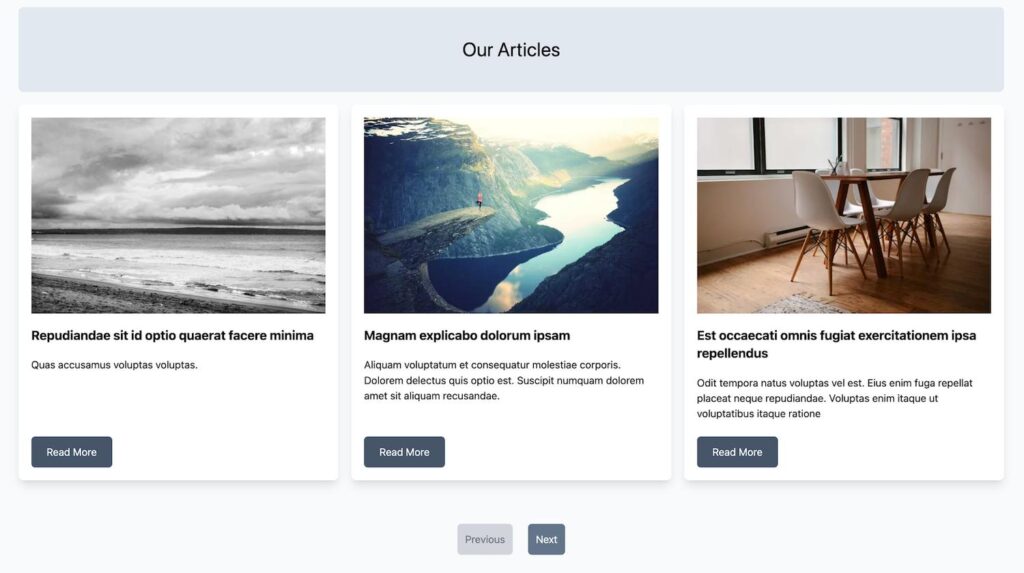
Now that we’ve handled breaking up the data into pages we can modify our template. Because we still end up assigning our final data to a variable called “posts” our template can stay exactly the same! In fact, if you refresh now you should only see three posts coming through on the home page.
All we need to do now is add pagination links below our grid of posts:
---
//... our JS we just worked on
---
<Layout>
	<div class="bg-slate-200 rounded-lg py-12">
		<h1 class="text-center text-3xl">Our Articles</h1>
	</div>

	<div class="flex flex-wrap pt-5 -mx-2.5">
		{posts.map(post => (
			<div class="lg:w-1/3 px-2.5 mb-5">
				<article class="rounded-lg bg-white shadow-lg p-5 h-full flex flex-col items-start justify-between">
					<div>
						<Image class="w-full object-cover aspect-2/3 mb-5" alt="" src={post.featuredImage.node.sourceUrl} width={600} height={400} />
						<h2 class="text-xl font-bold mb-5">{post.title}</h2>
						<p class="mb-6">{post.excerpt.replace(/<(.|\n)*?>/g, '')}</p>
					</div>
					<a class="inline-block bg-slate-600 text-white rounded-md px-6 py-3 hover:bg-slate-500" href={`/${post.slug}`}>Read More</a>
				</article>
			</div>
		))}
	</div>

	<div class="flex gap-6 justify-center items-center py-12">
		{page.url.prev ? <a class="p-3 rounded-md bg-slate-500 text-white" href={page.url.prev}>Previous</a> : <span class="text-gray-500 p-3 rounded-md block bg-gray-300">Previous</span>}
		{page.url.next ? <a class="p-3 rounded-md bg-slate-500 text-white" href={page.url.next}>Next</a> : <span class="text-gray-500 p-3 rounded-md block bg-gray-300">Next</span>}
	</div>

</Layout>
Boom. Out of the box this just works! You can now navigate between the pages and see all of your posts.
Next, we are going to change gears to add our tag functionality, but first some quick optimizations.
Creating a universal card component in Astro
Once we have tags setup, we’ll have a new archive template that will display basically the same grid style as our homepage, but with a filtered subset of posts.
In order to not repeat all our markup for the cards we use to display the post previews, let’s create a reusable component.
In your components directory add a file called “Card.astro”. Go ahead and cut and paste all the markup from inside our map function we use on the homepage:
---
---

<div class="lg:w-1/3 px-2.5 mb-5">
  <article class="rounded-lg bg-white shadow-lg p-5 h-full flex flex-col items-start justify-between">
    <div>
      <Image class="w-full object-cover aspect-2/3 mb-5" alt="" src={post.featuredImage.node.sourceUrl} width={600} height={400} />
      <h2 class="text-xl font-bold mb-5">{post.title}</h2>
      <p class="mb-6">{post.excerpt.replace(/<(.|\n)*?>/g, '')}</p>
    </div>
    <a class="inline-block bg-slate-600 text-white rounded-md px-6 py-3 hover:bg-slate-500" href={`/${post.slug}`}>Read More</a>
  </article>
</div>
We’ll also need to import the Image component and we’ll need to accept “post” data into this component as props. We can add that at the top of the file:
---
import { Image } from "astro:assets";
const {post} = Astro.props
---

<div class="lg:w-1/3 px-2.5 mb-5">
  <article class="rounded-lg bg-white shadow-lg p-5 h-full flex flex-col items-start justify-between">
    <div>
      <Image class="w-full object-cover aspect-2/3 mb-5" alt="" src={post.featuredImage.node.sourceUrl} width={600} height={400} />
      <h2 class="text-xl font-bold mb-5">{post.title}</h2>
      <p class="mb-6">{post.excerpt.replace(/<(.|\n)*?>/g, '')}</p>
    </div>
    <a class="inline-block bg-slate-600 text-white rounded-md px-6 py-3 hover:bg-slate-500" href={`/${post.slug}`}>Read More</a>
  </article>
</div>
Now, we can go back to our […page].astro file and use this component instead of all that markup. Don’t forget to import it as well:
---
import Card from "../components/Card.astro";
//... rest of imports and fetching logic
---

<Layout>
	<div class="bg-slate-200 rounded-lg py-12">
		<h1 class="text-center text-3xl">Our Articles</h1>
	</div>

	<div class="flex flex-wrap pt-5 -mx-2.5">
		{posts.map(post => (
			<Card post={post} />
		))}
	</div>

	<div class="flex gap-6 justify-center items-center py-12">
		{page.url.prev ? <a class="p-3 rounded-md bg-slate-500 text-white" href={page.url.prev}>Previous</a> : <span class="text-gray-500 p-3 rounded-md block bg-gray-300">Previous</span>}
		{page.url.next ? <a class="p-3 rounded-md bg-slate-500 text-white" href={page.url.next}>Next</a> : <span class="text-gray-500 p-3 rounded-md block bg-gray-300">Next</span>}
	</div>

</Layout
Ahhh, much nicer. Now we can reuse this for our tag pages as well. Let’s get into that next!
Setting up our queries for posts by tag
We are going to step away from Astro for a bit and jump back into our WordPress install for this next step.
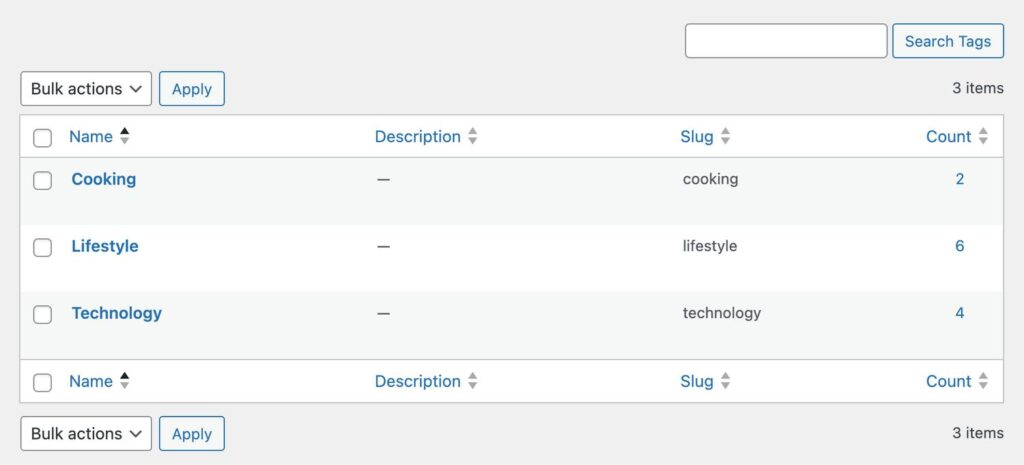
First we need some dummy data. You could use FakerPress, but for this I just created three tags: “cooking”, “technology”, and “lifestyle” manually. Then just make sure to apply them to a few posts each so that we have some data to work with.
Then, jump back into our WPGraphQL plugin so we can write some queries.
First, let’s figure out how to fetch all the tags and get each slug – we’ll use this in a getStaticPaths call to generate each of our individual tag archive pages.
You can use the query composer to build this out – or just type it, but the solution looks like this:

Next, we’ll look at how to fetch all the posts for that match a given tag. Again, it’s good practice to use the query composer, but you can also just copy the code from the image below showing the final query:
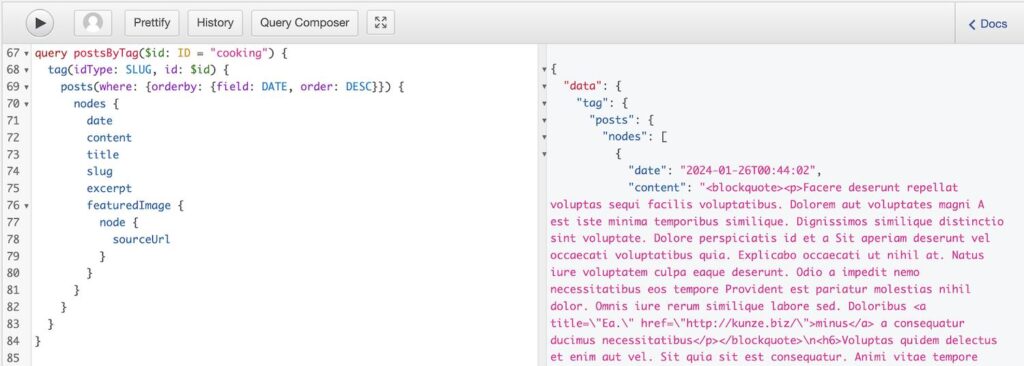
Nice! Armed with these two queries we can build out our tag pages.
Building the tag archive template in Astro
Within our src/pages/ go ahead and make a new directory called “tags”. Inside of this we can place a new file using dynamic routing: [tag].astro.
We’ll use our old friend getStaticPaths once again to generate a page for each tag.
---
import Layout from "../../components/Layout.astro";
import {API_BASE_URL} from "../../constants"

export async function getStaticPaths() {
  const response = await fetch(API_BASE_URL,
  {
    method: 'POST',
    headers: {'Content-Type':'application/json'},
    body: JSON.stringify({
      query: `
        query AllTags {
          tags {
            nodes {
              name
              slug
            }
          }
        }
      `
    }),
  });


	// destructure data from our JSON
	const { data } = await response.json();

	//  assign the array of nodes to "posts" variable for usability
	const tags = data.tags.nodes

  // transform our array of tag objects into an array of {params: {tag: "tag-slug"}}
  const paths = tags.map(tag => {
    return {
			params: {tag: tag.slug},
			props: {tagName: tag.name}
		}
  })

  return paths
}
---
Notice in addition to passing the slug through as the param, we can pass data to use in the template as props. I am passing the tag name so we can display it as the page title.
Next we need the logic to pull in the correct posts for each of these pages.
We already did the hard work of building out this query, so we can just pop it in and pass it our tag slug that we have access to through Astro.params
---
import Layout from "../../components/Layout.astro";
import {API_BASE_URL} from "../../constants"
export async function getStaticPaths() {
const response = await fetch(API_BASE_URL,
{
method: 'POST',
headers: {'Content-Type':'application/json'},
body: JSON.stringify({
query: `
query AllTags {
tags {
nodes {
name
slug
}
}
}
`
}),
});
// destructure data from our JSON
const { data } = await response.json();
// assign the array of nodes to "posts" variable for usability
const tags = data.tags.nodes
// transform our array of tag objects into an array of {params: {tag: "tag-slug"}}
const paths = tags.map(tag => {
return {
params: {tag: tag.slug},
props: {tagName: tag.name}
}
})
return paths
}
// Grab all the posts for the tag passed as a param in our dynamic route
const { tag } = Astro.params;
const { tagName } = Astro.props;
const response = await fetch(API_BASE_URL,
{
method: 'POST',
headers: {'Content-Type':'application/json'},
body: JSON.stringify({
query: `
query SingleTag($id: ID = "${tag}") {
tag(idType: SLUG, id: $id) {
posts(where: {orderby: {field: DATE, order: DESC}}) {
nodes {
date
content
title
slug
excerpt
featuredImage {
node {
sourceUrl
}
}
}
}
}
}
`
}),
});
// destructure data from our JSON
const { data } = await response.json();
const posts = data.tag.posts.nodes
---
<Layout>
<div class="bg-slate-200 rounded-lg py-12">
<h1 class="text-center text-3xl">{tagName}</h1>
</div>
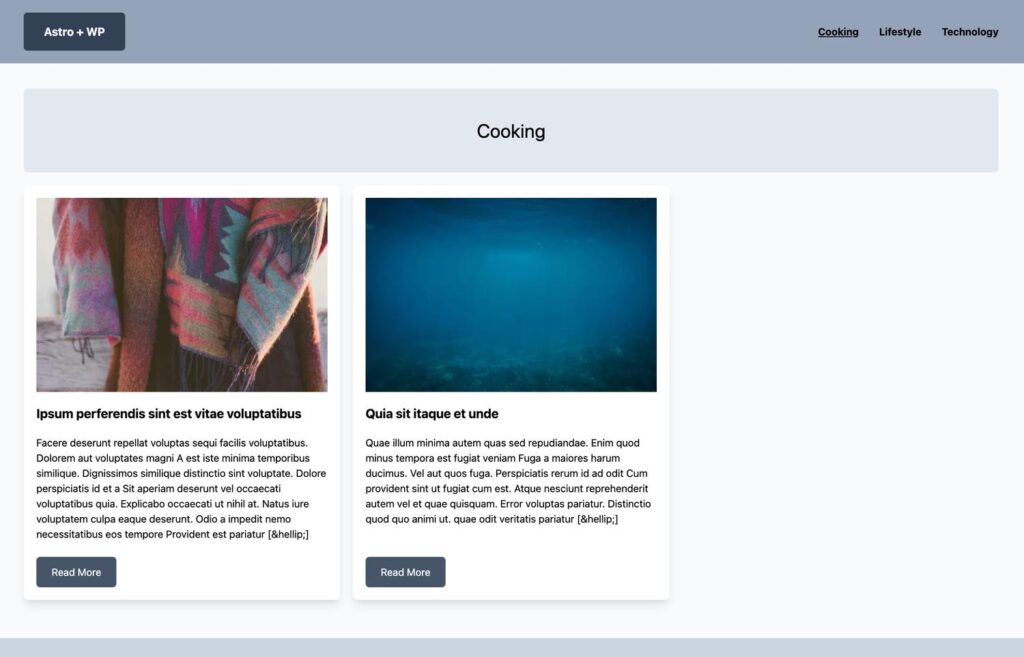
</Layout>I’ve added just a basic title element to display the tagName from our props as well. At this point we can go ahead and navigate to “/tags/cooking” (or whatever tag you may have used) and you should see a page displaying the correct tag name!
Perfect. We already have all the correct post data in there too, we just need to display it. We can just copy the grid and loop from the home page template. Don’t forget to copy the “Card.astro” import as well:
---
import Card from "../../components/Card.astro";
//... all our other imports and fetching logic
---
<Layout>
<div class="bg-slate-200 rounded-lg py-12">
<h1 class="text-center text-3xl">{tagName}</h1>
</div>
<div class="flex flex-wrap pt-5 -mx-2.5">
{posts.map(post => (
<Card post={post} />
))}
</div>
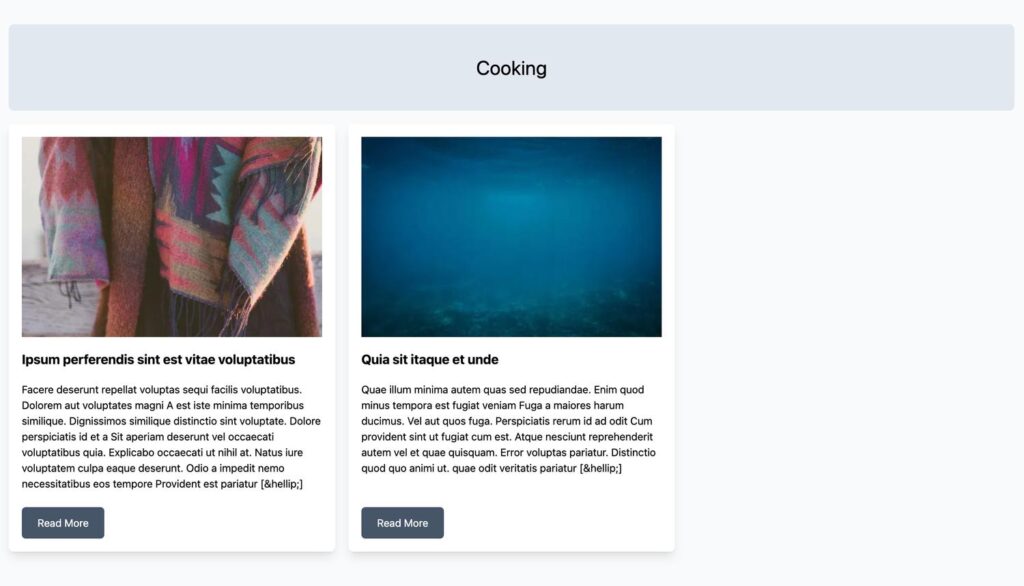
</Layout>Now our tag pages are all wired up and working!
Next up, we’ll add links to each tag page in our header dynamically, but first I want to do some major refactoring – buckle up – this is what development is all about.
Refactoring our API requests in Astro
Some of you may have already been thinking our templates a bit messy with all this GraphQL code in there. It will only get worse as we start reusing queries, for instance fetching all our tags again to display links to each in the header component.
Let’s refactor and centralize our GraphQL requests so that we can clean this up and reuse them in various templates. We’ll start with the [tag].astro template that we just created.
In your src directory create a new folder called “lib” and a file inside called “client.js”. We’ll cut the function we currently have in the getStaticPaths of our [tag].astro file and add it in here. We’ll also need to copy in the API_BASE_URL import.
import {API_BASE_URL} from "../constants"

export const getAllTags = async () => {
  const response = await fetch(API_BASE_URL,
    {
      method: 'POST',
      headers: {'Content-Type':'application/json'},
      body: JSON.stringify({
        query: `
          query AllTags {
            tags {
              nodes {
                name
                slug
              }
            }
          }
        `
      }),
    });

    // destructure data from our JSON
    const { data } = await response.json();

    //  return the array of nodes for usability
    return data.tags.nodes
}
At the end of the function just make sure you are returning data.tags.nodes, which is the array of all our tags.
Now, we can clean up our getStaticPaths function a bunch:
---
//... rest of imports

import {getAllTags} from "../../lib/client"

export async function getStaticPaths() {
  const tags = await getAllTags()

  // transform our array into an array of {params: {tag: "tag-slug"}}
  const paths = tags.map(tag => {
    return {
			params: {tag: tag.slug},
			props: {tagName: tag.name}
		}
  })

  return paths
}

// ... rest of functions and template file
Niiiiice. that’s so much better.
Let’s move the main GraphQL query from this file where we are fetching all the posts for a tag into its own client function as well:
// ... our getAllTags function and imports

export const getPostsByTag = async (tag) => {
  const response = await fetch(API_BASE_URL,
    {
      method: 'POST',
      headers: {'Content-Type':'application/json'},
      body: JSON.stringify({
        query: `
          query SingleTag($id: ID = "${tag}") {
            tag(idType: SLUG, id: $id) {
              posts(where: {orderby: {field: DATE, order: DESC}}) {
                nodes {
                  date
                  content
                  title
                  slug
                  excerpt
                  featuredImage {
                    node {
                      sourceUrl
                    }
                  }
                }
              }
            }
          }
        `
      }),
    });

  // destructure data from our JSON
  const { data } = await response.json();

  const posts = data.tag.posts.nodes

  return posts
}
We can go ahead and use this in our [tag].astro template now.
Check out how clean this file is now that we’ve abstracted out the GraphQL parts:
---
import Card from "../../components/Card.astro";
import Layout from "../../components/Layout.astro";
import {getAllTags, getPostsByTag} from "../../lib/client"

export async function getStaticPaths({paginate}) {
  const tags = await getAllTags()

  // transform our array into an array of {params: {tag: "tag-slug"}}
  const paths = tags.map(tag => {
    return {params: {tag: tag.slug}}
  })

  return paths
}


// Grab all the posts for the tag passed as a param in our dynamic route
const { tag } = Astro.params;
const { tagName } = Astro.props;

const posts = await getPostsByTag(tag)
---

<Layout>
	<div class="bg-slate-200 rounded-lg py-12">
		<h1 class="text-center text-3xl">{tagName}</h1>
	</div>

	<div class="flex flex-wrap pt-5 -mx-2.5">
		{posts.map(post => (
			<Card post={post} />
		))}
	</div>
</Layout>
We should also go back and refactor our [slug].astro template and index.astro template to use this approach, but I don’t want to bore you going through all of that here, so I think that is a perfect homework exercise.
If you get stuck, check out the github repo on the chapter 2 branch. This has all the finished code for this chapter and you can grab the refactored files from there. You can save this for after you finish the rest of this post.
For now, let’s see how we can use our new tag utility functions now to bring our tag pages into our header as navigation links as well.
It’s actually really easy. Just jump into the Header.astro file and use the getAllTags function we created:
---
import {getAllTags} from "../lib/client"

const tags = await getAllTags()
---

<header class="bg-slate-400 py-5 px-10 text-center">
  <div class="container mx-auto flex justify-between items-center">
    <a class="text-lg font-bold inline-block bg-slate-700 text-white py-4 px-8 rounded-md" href="/">Astro + WP</a>
    <div class="flex items-center gap-8">
      {tags.map(tag => (
        <a class="font-bold hover:underline" href={`/tags/${tag.slug}`}>{tag.name}</a>
      ))}
    </div>
  </div>
</header>
We can just map through and add links for each. This is why its a good idea to separate your presentational templates from your GraphQL logic – it makes reusing things super straightforward!
In a large project, rather than having a single client.js file with all our GraphQL templates it could even make sense to have files related to each resource. For example a lib/tag.js file for all queries dealing with tags, and a lib/post.js file for all our post related queries etc. Since this project is just a small demo I figured I would keep it to one client.js file for simplicity.
Wrapping Up and Next Steps
Nice work!
We now have nicely integrated headless blogging setup. We have pagination on our home page, plus support for tags that will automatically populate as links in our header as well.
I already mentioned refactoring the index and slug files as a homework exercise, but if you want to go further, you could easily apply similar techniques to support categories in addition to tags.
Also, I didn’t do it here, but it would make sense to go back and fetch tags for each post on our single post page and maybe display them as little pill icons. We could add this to our Card.astro template as well.
Coming up in the next lesson we’ll talk about how to handle custom post types and advanced custom fields.

Leave a Reply