Next.js is a great platform for creating web applications and in this article we’ll go through a quick and relatively easy setup to get a full credential based authentication system in place using NextAuth and MongoDB to store user information.
NOTE: If you’re looking for the quickest possible authentication setup with Next.js, check out my latest article about setting up Auth0 with Next.js. It’s a bit more beginner friendly. That said, if you are looking for a more flexible and customizable option go ahead and keep reading!
I found the documentation for NextAuth pretty lacking both in terms of credential authentication in general (which admittedly is intentional, since they encourage SSO) and especially with hooking up to MongoDB. With the free tier of the Atlas cloud service, MongoDB is a great database to get up and running with, particularly if you are less familiar with relational structures and more used to a document or json style database system.
If you just want to grab the final project files you can get them from my GitHub here. Otherwise just follow along!
This article assumes you have a basic development environment setup on your computer and have Node.js and npm installed.
To get started you can go ahead and run npx-create-next-app <name of app>
Dependencies
The great thing about Next.js is it handles a lot of the dependencies you’ll need, but we do need a handful of packages to connect to the database and work with authentication:
npm i mongoose next-auth next-connect validator bcrypt
Technically you don’t need mongoose and could connect directly with MongoDB, but mongoose makes it a much better developer experience so we are going to use it.
Set up our user schema
Before we set up authentication let’s set up the database where we will store our users.
Create a models directory in the base level of the app and add a file called user.js with the following code:
import mongoose from 'mongoose'
import bcrypt from 'bcrypt'
import validator from 'validator'

const userSchema = new mongoose.Schema({
    email: {
        type: String,
        required: true,
        unique: [true, "Account already exists"],
        validate: [validator.isEmail, 'Please enter a valid email']
    },
    password: {
        type: String,
        required: [true, "Please enter your email"],
        minLength: [6, "Your password must be at least 6 characters long"],
        select: false, //dont send back password after request
    },
    role: {
        type: String,
        default: 'user',
        enum: {
            values: [
                'user',
                'admin'
            ],
        }
    },
    createdAt: {
        type: Date,
        default: Date.now
    },
})

// ENCRYPTION
userSchema.pre('save', async function(next){
    if(!this.isModified('password')){
        next()
    }
    this.password = await bcrypt.hash(this.password, 10)
    next()
})

userSchema.methods.comparePassword = async function(enteredPassword){
    return await bcrypt.compare(enteredPassword, this.password)
}


export default mongoose.models.User || mongoose.model('User', userSchema)
This sets up our data for our users. We are just going to store email and password, but you can add in all kinds of extra profile data here. You’ll see in the project files I have added user roles in case you decide you’d like to have basic users and admins as well.
At the bottom of the file you’ll see mongoose uses a very specific export for Next.js. You will always want to export any models you create in this way with the “||” operator.
Finally, you’ll also notice we are attaching a pre-save method to encrypt the password which is VERY IMPORTANT. You never want to store raw passwords in a database. We also attach a method to the user model for comparing hashed passwords – we’ll use this later when logging in.
Set up our MongoDB database connection and env file
Now let’s go ahead and get connected to our database. You can use a local mongoDB instance, but I find the easiest and fastest way to get started is with Atlas, the cloud hosted Mongo service. You can sign up here and start a free cluster. I won’t walk through the full setup here, but you can check out this quick run through if you run into any trouble.
You’ll want to get all the way to hooking the database to an application where atlas will provide you with a connection string. Create a .env.local file and paste the string into a constant called DB_URI.
DB_URI=mongodb+srv://xxxx:<password>@xxxxxxxx.mongodb.net/?retryWrites=true&w=majorityStoring this in an environment variable keeps it secure so no one can gain access to your database.
Be sure to replace <password> with the actual password you set for the database user (not your atlas account).
Now we can create a utils folder and create a dbConnect.js file to actually connect. Within this you can add the following:
import mongoose from 'mongoose'

/**
Source :
https://github.com/vercel/next.js/blob/canary/examples/with-mongodb-mongoose/utils/dbConnect.js
**/

const MONGODB_URI = process.env.DB_URI

if (!MONGODB_URI) {
  throw new Error(
    'Please define the MONGODB_URI environment variable'
  )
}

/**
 * Global is used here to maintain a cached connection across hot reloads
 * in development. This prevents connections growing exponentially
 * during API Route usage.
 */
let cached = global.mongoose

if (!cached) {
  cached = global.mongoose = { conn: null, promise: null }
}

async function dbConnect () {
  if (cached.conn) {
    return cached.conn
  }

  if (!cached.promise) {
    const opts = {
      useNewUrlParser: true,
      useUnifiedTopology: true,
    }

    cached.promise = mongoose.connect(MONGODB_URI, opts).then(mongoose => {
      return mongoose
    })
  }
  cached.conn = await cached.promise
  return cached.conn
}

export default dbConnect
This sets up the mongo connection and exports the dbConnect() function. We’ll call this each time before we interact with the database on our backend.
Set up our signup and next auth endpoints
Now we can actually set up our endpoints!
I like to use next-connect for API endpoints because it works like express.js and lets us chain methods like .get and .post rather than doing a big switch statement or a bunch of if/else checks.
We can set this up by creating a handler.js file in our utils folder:
import nc from "next-connect";

function onError(err, req, res, next) {
  console.error(err);
  res.status(500).end(err.toString());
}

const handler = nc({
  onError: onError,
  onNoMatch: (req, res) => {
    res.status(404).send("Page is not found");
  },
})

export default handler
Now we can move into our pages folder where there is an api folder as well. We’ll create two files here. The first is signup.js where we’ll handle new users, the second has a fancy specific name of “[…nextauth].js” this allows it to handle any authentication requests through the NextAuth library.
First let’s setup our signup endpoint, as you can see its pretty simple!
import User from '../../../models/user';
import dbConnect from '../../../utils/dbConnect';
import handler from '../../../utils/handler';


handler
  .post(createUser)

async function createUser(req, res) {

  const data = req.body;

  const { email, password } = data;

  dbConnect();

  const user = await User.create(req.body)

  res.status(201).json({ message: 'Created user!' });

}

export default handler;
Now let’s take a look at what should go in the NextAuth special endpoint. I’d urge you to check out the documentation here, but I’ve also commented the code block below to explain what is happening. This is the most complex part of the project, so bear with me!
import NextAuth  from "next-auth";
import CredentialsProvider from "next-auth/providers/credentials"

import User from "../../../models/user";
import dbConnect from "../../../utils/dbConnect";

export default NextAuth({
    // Enable JSON Web Tokens since we will not store sessions in our DB
    session: {
        jwt: true
    },
    // Here we add our login providers - this is where you could add Google or Github SSO as well
    providers: [
        CredentialsProvider({
            name: "credentials",
            // The credentials object is what's used to generate Next Auths default login page - We will not use it however.
            credentials: {
                email: {label: "Email", type: "email"},
                password: {label: "Password", type: "password"}
            },
            // Authorize callback is ran upon calling the signin function
            authorize: async (credentials) => {
                dbConnect()

                // Try to find the user and also return the password field
                const user = await User.findOne({email: credentials.email}).select('+password')

                if(!user) { throw new Error('No user with a matching email was found.')}

                // Use the comparePassword method we defined in our user.js Model file to authenticate
                const pwValid = await user.comparePassword(credentials.password)

                if(!pwValid){ throw new Error("Your password is invalid") }

                return user
            }


        })
    ],
    // All of this is just to add user information to be accessible for our app in the token/session
    callbacks: {
        // We can pass in additional information from the user document MongoDB returns
        // This could be avatars, role, display name, etc...
        async jwt({token, user}){
            if (user) {
                token.user = {
                    _id: user._id,
                    email: user.email,
                    role: user.role,
                }
            }
            return token
        },
        // If we want to access our extra user info from sessions we have to pass it the token here to get them in sync:
        session: async({session, token}) => {
            if(token){
                session.user = token.user
            }
            return session
        }
    },
  pages: {
    // Here you can define your own custom pages for login, recover password, etc.
      signIn: '/login', // we are going to use a custom login page (we'll create this in just a second)
  },
})
Now our endpoints are ready and we just need to build our front end to allow users to sign up and sign in.
Enjoying the read?
Join 500+ developers and learn modern WordPress, JAMStack, and javascript frameworks with a monthly development newsletter geared towards agencies and freelancers.
Building the Next.js Front End
We are ready to build the front end!
The very first step is we need to wrap the entire app in the NextAuth provider. This lets us access our logged in user session from within our pages and components.
import { SessionProvider } from 'next-auth/react'


function MyApp({ Component, pageProps: { session, ...pageProps } }) {
  return (

    <SessionProvider session={session}>

          <Component {...pageProps} />

    </SessionProvider>

  )
}

export default MyApp
Now we can build out our basic pages
Setting up login page & auth-form component
First, let’s set up a sign up / sign in form. Signing up doesn’t actually use Next Auth, it simply creates a user record in the database. NextAuth will then kick in for our sign in/logout functions.
I’m going to store this form separately as a component because I am making a custom form that can switch between login and signup, so that we can brand and style the experience. Next Auth offers a generic sign in if you prefer, but I usually like to make a custom page like this.
I’m not going to walk through everything in this component, because most of it doesn’t really have to do with authentication, but pay attention to the onSubmit for login and signup. This is where we are shooting a request off to the two endpoints we just created in the last step:
import { useState, useRef } from 'react';
import { signIn } from 'next-auth/react';
import { useRouter } from 'next/router';

// This goes to our signup API endpoint
async function createUser(email, password) {
  const response = await fetch('/api/auth/signup', {
    method: 'POST',
    body: JSON.stringify({ email, password }),
    headers: {
      'Content-Type': 'application/json',
    },
  });

  const data = await response.json();

  if (!response.ok) {
    throw new Error(data.message || 'Something went wrong!');
  }

  return data;
}

// This gets handled by the [...nextauth] endpoint
function AuthForm() {
  const [registered, setRegistered] = useState(false)
  const emailInputRef = useRef();
  const passwordInputRef = useRef();

  // We keep track of whether in a login / or register state
  const [isLogin, setIsLogin] = useState(true);
  const router = useRouter();

  function switchAuthModeHandler() {
    setIsLogin((prevState) => !prevState);
  }

  async function submitHandler(event) {
    event.preventDefault();

    const enteredEmail = emailInputRef.current.value;
    const enteredPassword = passwordInputRef.current.value;

    // optional: Add validation here

    if (isLogin) {
      await signIn('credentials', {
        redirect: '/',
        email: enteredEmail,
        password: enteredPassword,
      });

    } else {
      try {
        const result = await createUser(enteredEmail, enteredPassword);
        setRegistered(true)
      } catch (error) {
        console.log(error);
      }
    }
  }

  return (
    <section className='max-w-xl mx-auto my-7'>
      {!registered ? (
        <>
          <h1>{isLogin ? 'Login' : 'Sign Up'}</h1>
          <form onSubmit={submitHandler}>
            <div >
              <label htmlFor='email'>Your Email</label>
              <input type='email' id='email' required ref={emailInputRef} />
            </div>
            <div >
              <label htmlFor='password'>Your Password</label>
              <input
                type='password'
                id='password'
                required
                ref={passwordInputRef}
              />
            </div>
            <div className='my-5'>
              <button className='button button-color mr-4'>{isLogin ? 'Login' : 'Create Account'}</button>
              <button
                type='button'

                onClick={switchAuthModeHandler}>
                {isLogin ? 'No Account? Create One' : 'Already a user? Login'}
              </button>
            </div>
          </form>
        </>
      ) : (
        <div className=''>
          <p>You have successfully registered!</p>

          <button onClick={() => router.reload()} className='button button-color'>Login Now</button>

        </div>
      )}

    </section>
  );
}

export default AuthForm;
Now we can include this form in a login.js file we’ll create under our pages:
import { useRouter } from 'next/router';
import { getSession } from 'next-auth/react';
import { useEffect, useState } from 'react';

import AuthForm from '../components/auth-form';

function AuthPage() {
  const [isLoading, setIsLoading] = useState(true);
  const router = useRouter();

  // check if logged in and redirect to home page if so
  useEffect(() => {
    getSession().then((session) => {
      if (session) {
        router.replace('/');
      } else {
        setIsLoading(false);
      }
    });
  }, [router]);

  if (isLoading) {
    return <p>Loading...</p>;
  }

  return <AuthForm />;
}

export default AuthPage;
At this point we could visit and create a user and sign in, but we wouldn’t really be able to tell its working besides checking the database and looking in our inspector at our site sessions.
Before we test let’s edit the home page so that it will display the user email and a logout button if we are currently sign in.
import Head from 'next/head'
import styles from '../styles/Home.module.css'
import { useSession, signOut, signIn, signUp } from 'next-auth/react';
import Link from 'next/link';

export default function Home() {

  const { data: session } = useSession()

  return (
    <div className={styles.container}>
      <Head>
        <title>Basic Auth</title>
      </Head>

      <main className={styles.main}>
        <h1>Hello {session?.user?.email || "Unknown"}</h1>
        <Link href="/login">
          <button onClick={() => signIn()}>Sign In</button>
        </Link>
        <button onClick={() => signOut()}>Sign Out</button>
      </main>
    </div>
  )
}
Awesome. Now we can run our app and navigate to “/login” where we will see our form. We can flip into sign up mode and create a user, then flip to login mode and sign in with those same credentials.
Voila! You should now see the user email in the home page greeting. You can hit sign out and get redirected to the generic home page if you’d like to test that as well.
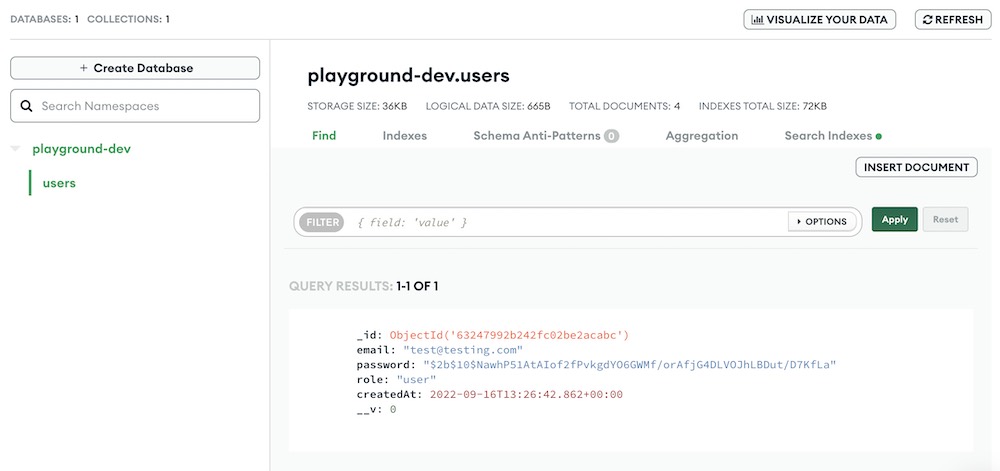
If you take a look in the database you’ll see the user object was created and the password is hashed for security.
Protected Pages with NextAuth
I would argue the main point of having authentication is really to be able to protect pages and api endpoints, so let’s see how to do that now.
Create a checkUser.js file in your utils folder. We’ll use this to simply validate whether a user is logged in. You’ll see I’ve included a function to check user role as well for creating admins.
import { getToken } from "next-auth/jwt"

const secret = process.env.NEXTAUTH_SECRET

// CHECKING FUNCTIONS
export const hasToken = async (req) => {
  const token = await getToken({ req, secret })
  if(!token){
    return false
  }
  return true
}

export const isAdmin = async (req) => {
  const token = await getToken({ req, secret })
  if(!token || token.user.role !== 'admin'){
    return false
  }
  return true
}
You’ll notice we are using another environment variable, the “NEXTAUTH_SECRET”. This is simply a random string used for encrypting web tokens. You can generate a secure one with this command:
$ openssl rand -base64 32Now let’s go into our pages folder and create a protected-page.js file. This will be our page only accessible when logged in.
We’ll include our util function we just wrote and use it within getServerSideProps to check on the server whether the user is logged in. We could also within the component use a useEffect to check the session client side instead of the token, but I prefer to keep all this logic on the server.
import { hasToken } from '../utils/checkUser'

const ProtectedPage = () => {
  return (
    <div>
      This page is protected.
    </div>
  )
}

export default ProtectedPage


export async function getServerSideProps(context) {

  const token = await hasToken(context.req)

  if(!token){
      return {
          redirect: {
              destination: '/',
              permanent: false
          }
      }
  }

  return { props: {}}
}
Go ahead and test it out and you’ll see you can only access this page now when logged in!
Protected api route with NextAuth
What about protecting API routes? We definitely don’t want anyone to be able to hit powerful API endpoints like deleting content or things like that.
The process is very similar.
First, we’ll add some middleware functions into our checkUser.js file. They are basically the same, but we call next() rather than returning true or false.
import { getToken } from "next-auth/jwt"

const secret = process.env.NEXTAUTH_SECRET

// CHECKING FUNCTIONS
export const hasToken = async (req) => {
  const token = await getToken({ req, secret })
  if(!token){
    return false
  }
  return true
}

export const isAdmin = async (req) => {
  const token = await getToken({ req, secret })
  if(!token || token.user.role !== 'admin'){
    return false
  }
  return true
}

// API MIDDLEWARE
export const hasTokenMiddleware = async (req, res, next) => {
  const token = await getToken({ req, secret })
  if(!token){
    return next(new Error('Not Allowed - Not logged in'))
  }
  next()
}
export const isAdminMiddleware = async (req, res, next) => {
  const token = await getToken({ req, secret })
  if(!token || token.user.role !== 'admin'){
    return next(new Error('Not Allowed - Not admin'))
  }
  next()
}
Create a protected.js file within the api folder with the following code:
import { hasTokenMiddleware } from "../../utils/checkUser"
import handler from '../../utils/handler';

handler
  .use(hasTokenMiddleware)
  .get(protectedAPI)

async function protectedAPI(req, res, next) {
  res.status(200).send('Success!')
}

export default handler
You’ll see its essentially the same idea as with pages. Now we can test and you’ll see that when you try to access this endpoint without logging in – no dice, but once logged in navigate to /api/protected and you’ll see a success message!
Again in a real world setting you’ll likely want to use the second function in our util file that checks if the user role is ‘admin’ in order to make sure certain functionally cannot be accessed by users that just sign up on the open form.
As the app owner you can then manually go into the database and change a user’s role to admin as desired.
Closing thoughts
Authentication is always a bit of a pain to setup when you just want to start building something cool, but hopefully this will help you get through this necessary phase faster, so you can focus on your project.
Feel free to grab all the files we create in the tutorial off my GitHub page here if you want to just dive in and get started.
Leave a Reply