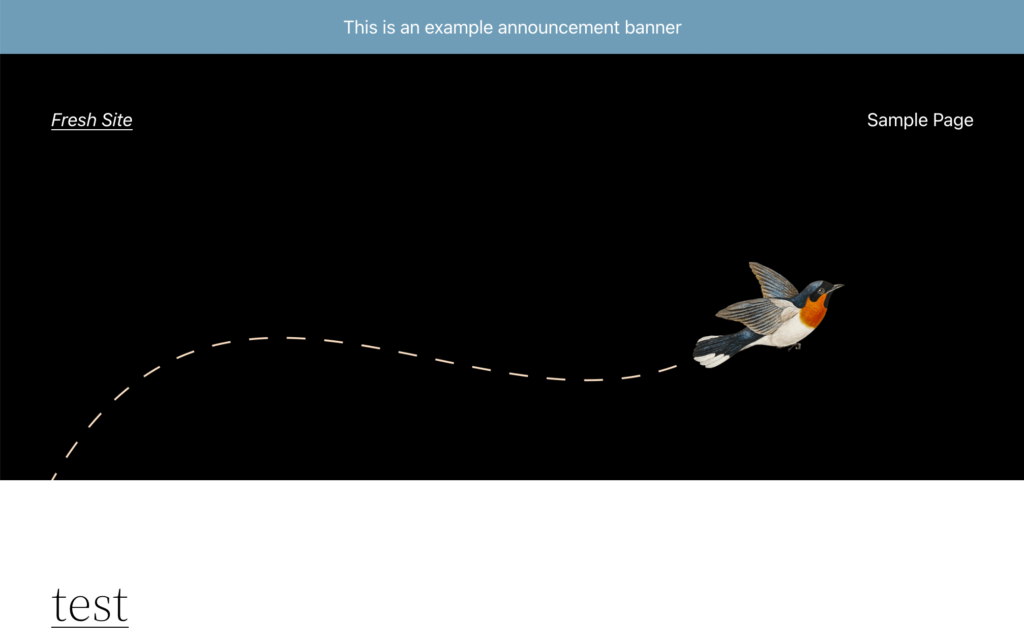
In this tutorial we’ll walk through creating a custom plugin with an admin settings page and cover the WordPress Options API. We’ll be building an announcement banner plugin that lets you display a basic banner above the header on your site.
The basic steps of this build are the following:
- Register an option within the WordPress Database to store our data
- Create a settings page in our admin
- Build out the content and form for our settings page
- Create a function to handle our setting page save functionality and update our option
- Display the banner on the front end of the site
This should actually be a pretty quick build, so let’s jump right into the action and see how to use the Options API within WordPress to store our own piece of site data.
If you get stuck at any point along the way, feel free to take a look at the finished code on Github.
Introducing the Options API
WordPress has two APIs that deal with custom site settings: the Options API and the Settings API.
The Options API provides functionality for saving, updating, and retrieving data from the wp_options table within our WordPress database.
The Settings API provides a toolkit for creating settings pages that can interact with the Options API to manipulate your site settings.
In this write up, we will only use the Options API.
Though the settings API can be useful and provides built in security features, it is also very limiting and requires a lot of code to build a simple interface. By learning how to handle some of the security ourselves, it frees us to build interfaces however we want directly in HTML. This is ultimately more flexible in my opinion.
Getting Started
Open up a fresh WordPress install, or an experimental site where you can do some plugin development, and create a new folder in the wp-content/plugins directory called fsd-banner. This is where we will build our plugin.
To start, create an index.php file and add the following boilerplate code:
<?php
/**
 * Plugin Name:       FSD Banner
 * Plugin URI:        https://fullstackdigital.io
 * Description:       A plugin for adding blocks to a theme.
 * Version:           1.0.0
 * Requires at least: 5.9
 * Requires PHP:      7.2
 * Author:            Full Stack Digital
 * Author URI:        https://fullstackdigital.io
 * Text Domain:       fsd-b
 */

if(!function_exists('add_action')) {
  echo 'Seems like you stumbled here by accident. 😛';
  exit;
}

// Setup
define('FSD_PLUGIN_DIR', plugin_dir_path(__FILE__));
define('FSD_PLUGIN_FILE', __FILE__);

// Includes
$rootFiles = glob(FSD_PLUGIN_DIR . 'includes/*.php');
$subdirectoryFiles = glob(FSD_PLUGIN_DIR . 'includes/**/*.php');
$allFiles = array_merge($rootFiles, $subdirectoryFiles);

foreach($allFiles as $filename) {
  include_once($filename);
}
This snippet of code is how I start all my plugins. It has the required comments up top, then a safety check to make sure the file is only executed in the WordPress context by checking if the add_action function exists, and exiting if not.
Finally, we include all files within any directories or subdirectories of the plugin, so that we can freely break up our code into separate files without worrying about adding include statements.
Creating an Option
Let’s begin the actual build by registering our option in the database. We will want to store the following data:
- Announcement banner text
- A background color
- A text color
- A boolean of whether to enable the banner
While we could create four different options for this, I prefer to just create one option for the plugin that stores an associative array with all these values. WordPress will serialize the array for us when saving and retrieving from the database, which makes it a painless workflow and keeps things consolidated.
We’ll create the Option by hooking into the plugin activation:
// Hooks
register_activation_hook( __FILE__, 'fsd_activate_plugin' );

function fsd_activate_plugin() {
  // Check if current version is below 5.9
  if(version_compare(get_bloginfo( 'version' ), '5.9', '<')){
    wp_die( __('You must run WP version 5.9 or higher', 'fsb-b') );
  }

  // OPTIONS SETUP
  // first check if options are already there
  $options = get_option( 'fsd_banner_options' );

  // on first activation will return false
  if(!$options){
    add_option( 'fsd_banner_options', [
      "banner_text" => "Enter your banner text here...",
      "enable_banner" => 0,
      "banner_background_color" => "#f5f5f5",
      "banner_text_color" => "#222222"
    ]);
  }
}
This looks slightly different than a typical add_action, but the idea is the same. When the plugin gets activated we will check if our option already exists (in case someone deactivates and then reactivates the plugin). If not, we create it with some default values.
At this point you can go ahead and activate the plugin on your site and if you check the wp_options table and look at the very end you should see your option added!
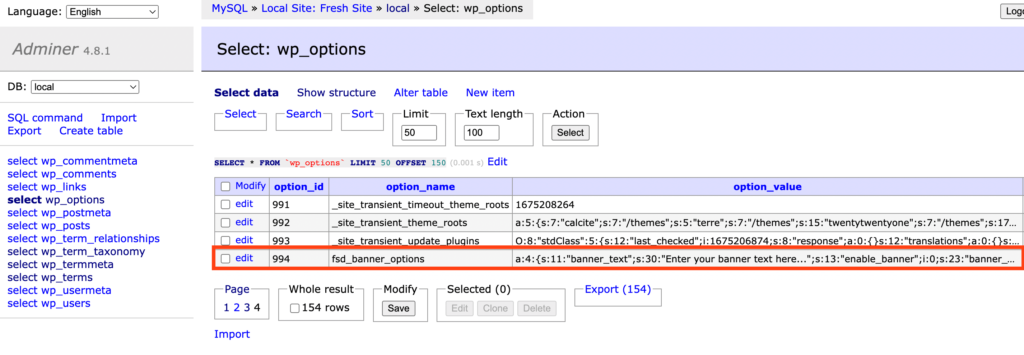
Congrats! you just set up a custom piece of site data in WordPress!
Creating the Settings Page
Next up, let’s create an admin page where we can edit this new piece of site data.
We’ll add the following hook to our main php file:
 // Custom menu page
add_action('admin_menu', 'fsd_admin_menu');
You can create the fsd_admin_menu function in the main index.php file, or you can split things up to stay organized. I’d recommend creating an “includes” folder and then creating a file called ‘admin-page.php’ and defining the function there.
The nice thing is that since we used our boilerplate that includes all PHP files in the plugin, we don’t need to manually include the file or anything like that, this file will be picked up automatically.
function fsd_admin_menu(){
  add_menu_page(
    "Announcement Banner Settings", // Page Title
    "Banner", // Title in Sidebar
    'edit_theme_options', // Capability needed to access
    'fsd-banner', // slug - acts as ID of the menu page
    'fsd_banner_options_page', // function to render the page
  );
}
The add_menu_page function it takes a few arguments as setup, but most importantly we provide a function name for rendering the settings page itself.
We’ll define that function next, feel free to keep it in the admin-page.php file since its related, or break it into another file if you’d like!
Render the Content of the Settings Page
Within our function we will scaffold out a form with the fields we need for our banner settings. I wrapped everything in a div with the “.wrap” class, this is common in default WordPress settings pages and provides the standard padding.
I use tables to layout the form again because this is how native WordPress lays out these forms, but you can also style this however you like. I tend to prefer sticking with native WP styles by inspecting other settings pages and emulating the structure.
<?php

function fsd_banner_options_page(){

$options = get_option('fsd_banner_options');

?>

  <!-- .wrap adds padding -->
  <div class="wrap">

    <h1><?php esc_html_e('Banner Settings', 'fsd-b' ); ?></h1>

    <form novalidate="novalidate" method="POST" action="admin-post.php">

      <table class="form-table">
        <tbody>
          <!-- Banner BG Color -->
          <tr>
            <th>
              <label for="fsd_banner_color">
                <?php esc_html_e('Banner Background Color', 'fsd-b'); ?>
              </label>
            </th>
            <td>
              <input type="text" id="fsd_banner_color" name="fsd_banner_color" class="fsd-color-field" />
            </td>
          </tr>
          <!-- Banner Text Color -->
          <tr>
            <th>
              <label for="fsd_banner_text_color">
                <?php esc_html_e('Banner Text Color', 'fsd-b'); ?>
              </label>
            </th>
            <td>
              <input type="text" id="fsd_banner_text_color" name="fsd_banner_text_color" class="fsd-color-field" />
            </td>
          </tr>
          <!-- Banner Text -->
          <tr>
            <th>
              <label for="fsd_banner_text">
                <?php esc_html_e('Banner Text', 'fsd-b'); ?>
              </label>
            </th>
            <td>
              <input name="fsd_banner_text" type="text" id="fsd_banner_text"
                class="regular-text"
              />
            </td>
          </tr>
          <!-- Enable Banner -->
          <tr>
            <th>
              <?php esc_html_e('Show Banner?', 'fsd-b'); ?>
            </th>
            <td>
            <label for="fsd_enable_banner">
              <input name="fsd_enable_banner" type="checkbox" id="fsd_enable_banner" value="1" />
              <span>Enable</span>
            </label>
            </td>
          </tr>

        </tbody>
      </table>

      <?php submit_button(); ?>

    </form>
  </div>

<?php
}
The main thing to call out here is the action for the form, it needs to point to admin-post.php to enable us to catch the submission.
You’ll notice the inputs are missing value attributes right now, we’ll populate these by grabbing our option value from the database.
<?php

function fsd_banner_options_page(){

$options = get_option('fsd_banner_options');

?>

  <!-- .wrap adds padding -->
  <div class="wrap">

    <h1><?php esc_html_e('Banner Settings', 'fsd-b' ); ?></h1>

    <form novalidate="novalidate" method="POST" action="admin-post.php">

      <table class="form-table">
        <tbody>
          <!-- Banner BG Color -->
          <tr>
            <th>
              <label for="fsd_banner_color">
                <?php esc_html_e('Banner Background Color', 'fsd-b'); ?>
              </label>
            </th>
            <td>
              <input type="text" value="<?php echo esc_attr($options["banner_background_color"]); ?>" id="fsd_banner_color" name="fsd_banner_color" class="fsd-color-field" />
            </td>
          </tr>
          <!-- Banner Text Color -->
          <tr>
            <th>
              <label for="fsd_banner_text_color">
                <?php esc_html_e('Banner Text Color', 'fsd-b'); ?>
              </label>
            </th>
            <td>
              <input type="text" value="<?php echo esc_attr($options["banner_text_color"]); ?>" id="fsd_banner_text_color" name="fsd_banner_text_color" class="fsd-color-field" />
            </td>
          </tr>
          <!-- Banner Text -->
          <tr>
            <th>
              <label for="fsd_banner_text">
                <?php esc_html_e('Banner Text', 'fsd-b'); ?>
              </label>
            </th>
            <td>
              <input name="fsd_banner_text" type="text" id="fsd_banner_text"
                class="regular-text"
                value="<?php echo esc_attr($options["banner_text"]); ?>"
              />
            </td>
          </tr>
          <!-- Enable Banner -->
          <tr>
            <th>
              <?php esc_html_e('Show Banner?', 'fsd-b'); ?>
            </th>
            <td>
            <label for="fsd_enable_banner">
              <input name="fsd_enable_banner" type="checkbox" id="fsd_enable_banner"
                value="1" <?php checked( '1', $options["enable_banner"] ); ?> />
              <span>Enable</span>
            </label>
            </td>
          </tr>

        </tbody>
      </table>

      <?php submit_button(); ?>

    </form>
  </div>

<?php
}
Security Fields
Finally, we need a couple specialized fields specifically for WordPress.
First, we need a hidden input with the name attribute set to “action” and the value set to the name of a function that we will create shortly to handle the submission on the backend and save our submitted values to the wp_options table.
Second, we need a nonce field. This is a specialized field that generates a value that WordPress can then check on the backend to verify that the request came from the WordPress admin. Without it, someone could theoretically send a request direct to admin-post.php without being logged in.
<?php // Rest of form ?>
<form novalidate="novalidate" method="POST" action="admin-post.php">

      <!-- This hidden input is required to provide the name of the function to run -->
      <input type="hidden" name="action" value="fsd_save_options" />
      <!-- The nonce field is a security feature to avoid submissions from outside WP admin -->
      <?php wp_nonce_field( 'fsd_banner_options_verify'); ?>

<table class="form-table">
<?php // Rest of form ?>
At this point you can navigate to the admin and view our form from the backend!
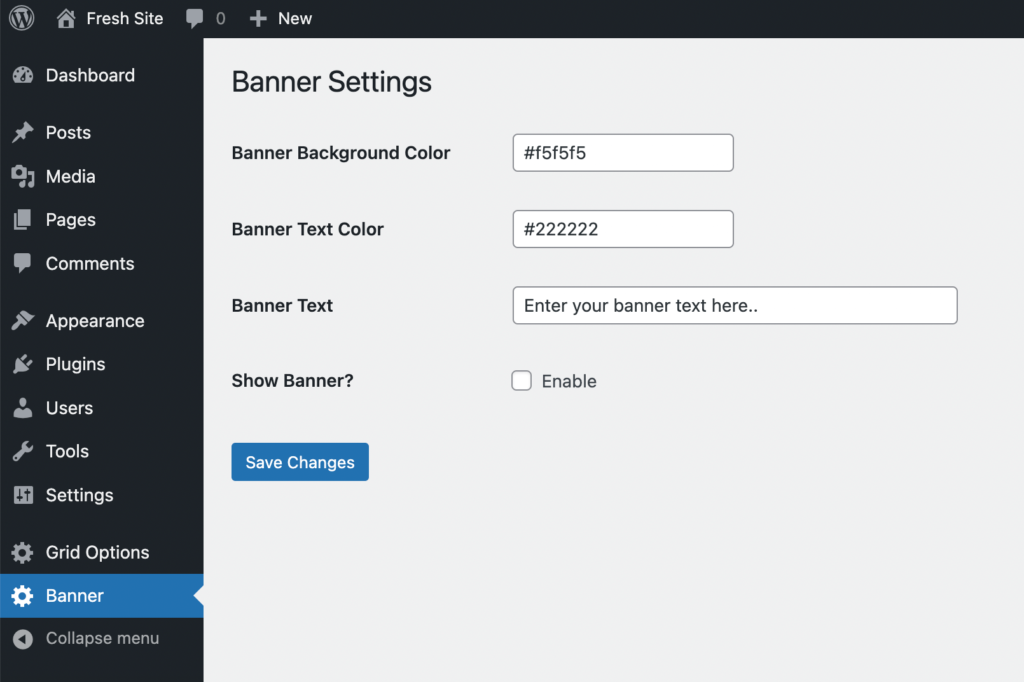
Right now it just looks like a handful of basic text fields, but let’s spice it up a bit by adding a color picker UI as well.
Color Picker UI
WordPress uses jQuery under the hood and has a built in UI we can take advantage of. First, we need to create a javascript file that we can use to initialize the field. Create a file called color.js in the root plugin directory with the following code snippet:
(function ($) {
	$('.fsd-color-field').wpColorPicker();
})(jQuery);
We target our inputs with the “.fsd-color-field” and initialize the color picker UI.
Now, we need to enqueue this file from within the admin. Add the following in the main index.php file for our plugin:
add_action( 'admin_enqueue_scripts', 'fsd_enqueue_color_picker' );

function fsd_enqueue_color_picker( $hook_suffix ) {

  // first check that $hook_suffix is appropriate for your admin page
  if($hook_suffix == "toplevel_page_fsd-banner"){
    wp_enqueue_style( 'wp-color-picker' );
    wp_enqueue_script( 'fsd-b-js', plugins_url( 'color.js', __FILE__ ), array( 'wp-color-picker' ),
    false, true );
  }

}
The admin_enqueue_scripts hook provides us a special argument called $hook_suffix that is the ID of the current admin page. I usually do a var_dump of this value on the page I want to target, then add the conditional check ensure the enqueue happens on the correct page.

After verifying we are on the right page, we enqueue the script we just created, as well as a css file that is built in to WordPress for the color picker element, passing this as a dependency as well.
Now, if we return to our plugin page we should see a jQuery based color picker UI for both our color fields:
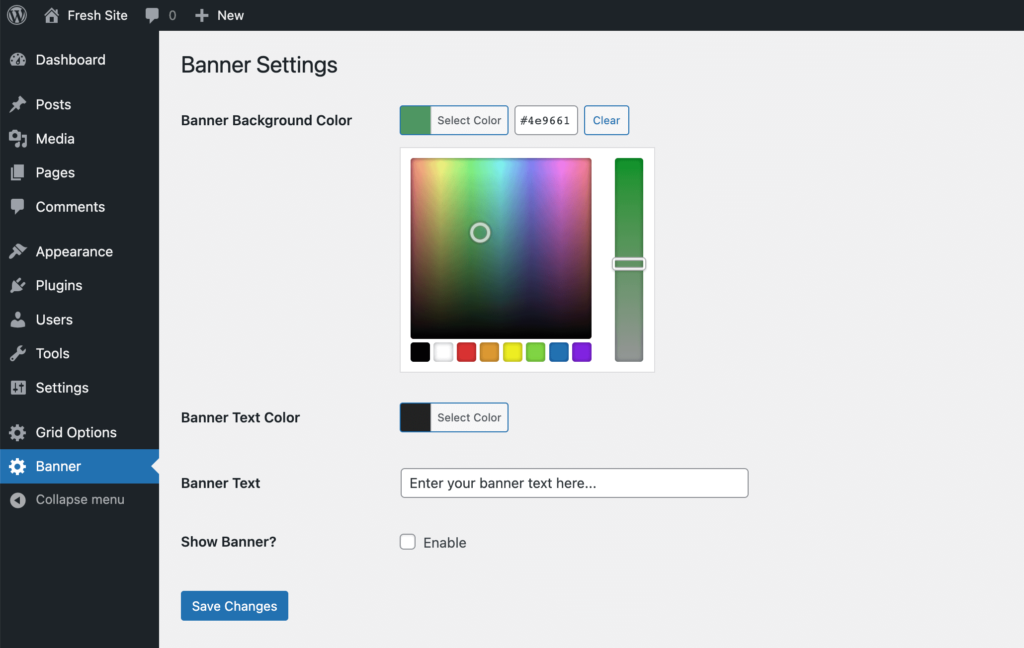
You can use a similar approach to build your own React form components by creating a target div in the settings page, enqueueing a custom script with your component and initializing it on the target div. Then you can update a hidden field value in the form with your React component.
Handle the Submission of the Form
Now we just need to create our function that handles the form submission and saves our options to the database.
Create a new file in our includes folder called “save-options.php” and add the following code:
function fsd_save_options(){

  // Make sure user actually has the capability to edit the options
  if(!current_user_can( 'edit_theme_options' )){
    wp_die("You do not have permission to view this page.");
  }

  // pass in the nonce ID from our form's nonce field - if the nonce fails this will kill script
  check_admin_referer( 'fsd_banner_options_verify');

  // Get the current options from DB
  $options = get_option('fsd_banner_options');

  // Update with submitted options
  // sanitization is optional, options API will do this too, but never bad idea to manually sanitize before DB anyway
  $options['banner_text'] = sanitize_text_field( $_POST['fsd_banner_text'] );
  $options['enable_banner'] = absint( $_POST['fsd_enable_banner'] );

  // Grab the color field values
  $color = sanitize_text_field( $_POST['fsd_banner_color'] );
  $text_color = sanitize_text_field( $_POST['fsd_banner_text_color'] );

  // If they are valid go ahead and update
  if(check_color($color)){
    $options['banner_background_color'] = $color;
  }

  if(check_color($text_color)){
    $options['banner_text_color'] = $text_color;
  }

  // actually trigger the update of options
  update_option(
    'fsd_banner_options',
    $options
  );

  // redirect to the admin page of our menu and add status=1 if success to display notice in the admin
  wp_redirect( admin_url( 'admin.php?page=fsd-banner&status=1' ) );
}

// Quick and dirty check for hex values - not perfect, but does the job
function check_color( $value ) {
	if ( preg_match( '/^#[a-f0-9]{6}$/i', $value ) ) { // if user insert a HEX color with #
		return true;
	}
	return false;
}
To begin with we need to first check that the user has the correct permissions and check the nonce that we setup when creating the form. Then we grab our option from the database and update with our submitted values. Sanitization here is optional, but never a bad idea!
For the color fields, I’ve added a simple check_color function to validate it as a hex code.
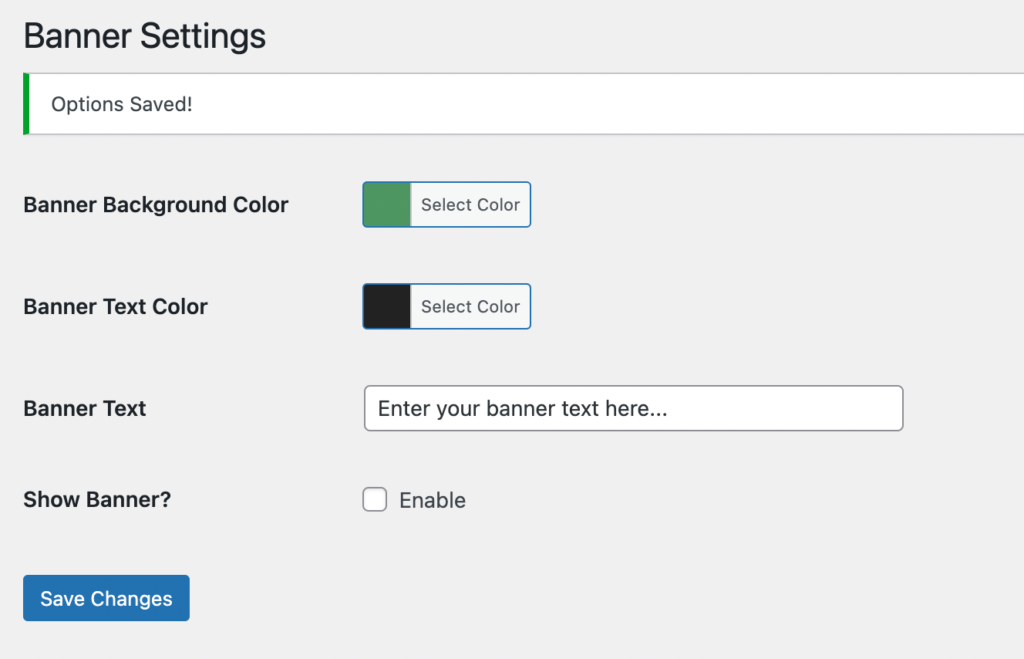
Finally, after updating our option we redirect to the same page but add “status=1” as a query parameter. We can update our form to check for this, and display a success message to notify the user that the save was successful.
<?php
// Check if status is 1 which means a successful options save just happened
if(isset($_GET['status']) && $_GET['status'] == 1): ?>
<div class="notice notice-success inline">
<p>Options Saved!</p>
</div>
<?php endif;
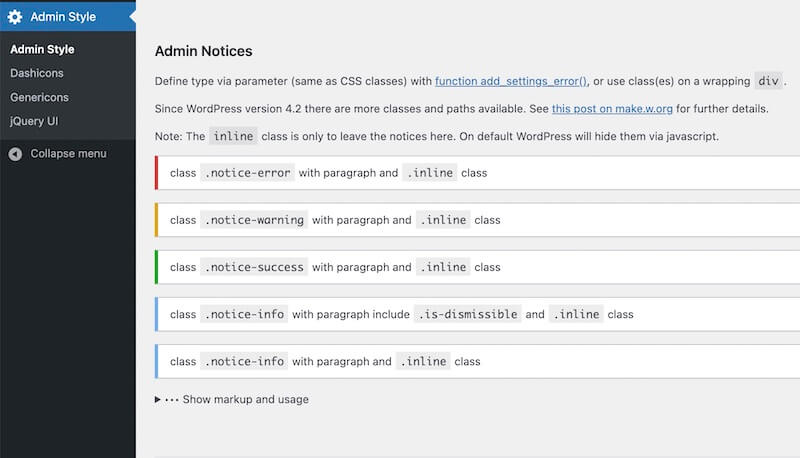
?>If you’re curious about the classes that are used to style this notification, they were grabbed by using the Admin Style plugin which is developer focused plugin that shows how to recreate various native WordPress elements with classes.
Displaying the Banner on the Front End
We are done with the hard part of building the plugin!
Now the only thing left to do is to output our banner on the front end. This part is relatively simple.
First, we jump into the main index.php file and add a new hook:
add_action('wp_body_open', 'fsd_render_banner');This will output content just after the opening body tag, and before our header in most standard themes.
Now create a new file in our includes folder called “banner-render.php” and define the following function:
function fsd_render_banner(){

  $options = get_option( 'fsd_banner_options' );

  if(!$options["enable_banner"]){
    // Bail out and do nothing if not enabled within options
    return;
  }

  // We escape our value from the database to be on the safe side
  $content = esc_html( $options['banner_text'] );
  $bg_color = esc_attr( $options['banner_background_color'] );
  $text_color = esc_attr( $options['banner_text_color'] );

  ?>

  <style>
    .fsd-banner {
      padding-top: 12px;
      padding-bottom: 12px;
      text-align: center;
      background: <?php echo $bg_color; ?>;
      color: <?php echo $text_color; ?>;
    }
  </style>

  <div class="wp-site-blocks fsd-banner">
    <?php echo $content; ?>
  </div>

  <?php
}
In this function, we grab our custom option item from the database, and check if the banner has been enabled. If not, we simply return the function.
Next, we escape all our values. This is to protect visitors to the site in the event that the WordPress database is compromised and malicious code gets inserted. By escaping, we prevent the code from getting executed on client machines.
We then output a div for a banner, as well as a style tag to apply our custom colors. In reality, outputting a style tag directly like this is not the most optimized way to handle styles, but for the purpose of this demo we’ll keep it simple.
You might have noticed in addition to our “.fsd-banner” class, we applied the “.wp-site-blocks” class, this adds the same padding as our main content area, so that the banner aligns with everything else on the site.
Go ahead and enter some options in the admin, check the “enable banner” checkbox, and hit update. Check the front end of your site and you should see the banner appear!
Wrap up
Congratulations!
You just built a full plugin with a custom settings page and created a piece of site data using the Options API.
While this banner we built might not be the most exciting application, these principles unlock the ability to do some powerful customization within the WordPress admin.
If you ran into any problems, feel free to take a look at the finished code for this project on Github.
If you’d like to go even farther, check out this write up which covers similar topics, but uses React to create an interface with AJAX behind the scenes updating of meta data.

Leave a Reply