In this lesson we’ll go over the basics for creating custom blocks with the Advanced Custom Fields plugin.
If you’ve been following along with the course so far, this will feel very familiar to building dynamic blocks. ACF blocks are even quicker and simpler, since ACF will handle the interface for our editor mode.
Note: This post is part of the Block Creator series. These lessons build on each other, so it is recommended to complete them in order to get the most out of the course.
You can find links to all the Block Creator lessons on the main course page. You can also download this finished code from the course Github repo in case you get stuck at any point.
How ACF Blocks work
Under the hood, ACF blocks are essentially just dynamic blocks. The “edit” function that we would normally write with jsx/React is instead handled by the ACF plugin.
This greatly simplifies the block creation process. Essentially, to spin up a new block all we need is a block.json file for our block setup, any CSS or JS files we want to include, and a PHP render template.
If you are uncomfortable with React and javascript, ACF blocks are a great way to take advantage of the block editor without diving into a new ecosystem. In fact, the block in this lesson won’t need any compilation or extra tooling whatsoever. We will just be using a plain old php and css file!
We won’t dive into all the different field types, options, and configuration you can do for ACF blocks since this would warrant a whole course by itself. Instead, we will go through a typical setup for an ACF block to cover the basics. If you’re new to it, this is an in-depth ACF field guide that covers all the fields types, options, and more.
We’ll be building a call to action block like the one below. This matches the dynamic block we built earlier in this course series. You can compare and contrast the two and see how to transition between dynamic and ACF powered blocks.

Setting up our plugin
As usual we’ll be doing this as a plugin for demonstration purposes. You could just as easily build ACF blocks into a custom one-off theme for a client as well.
In a development site, go ahead and make sure you have ACF pro installed and active. Then in the plugins folder create a new directory for your block. I’ll call mine “acf-demo-block”.
I’ll use the following folder structure. Go ahead and create these files and folders now:
acf-demo-block/
├── acf-cta-block/
│   ├── block.json
│   ├── style.css
│   └── render.php
└── index.php
Let’s start building out the files.
First, go ahead and add the plugin boilerplate comment and the block registration function into our root php file:
<?php
/**
 * Plugin Name:       Acf Demo Block
 * Description:       Example block scaffolded with Create Block tool.
 * Requires at least: 6.1
 * Requires PHP:      7.0
 * Version:           0.1.0
 * Text Domain:       acf-demo-block
 */

/**
 * Registers the block using the metadata loaded from the `block.json` file.
 * Behind the scenes, it registers also all assets so they can be enqueued
 * through the block editor in the corresponding context.
 *
 * @see https://developer.wordpress.org/reference/functions/register_block_type/
 */

function create_block_acf_demo_block_block_init() {
	register_block_type( __DIR__ . '/acf-cta-block' );
}
add_action( 'init', 'create_block_acf_demo_block_block_init' );
You can see we just have to point our usual register_block_type function to the folder where our block.json file is. You could repeat this for as many blocks as you want to create within your plugin package. Just place each in its own directory and point to all of them.
In order for the registration to work, we need to populate our block.json file.
Setting up a block.json file for ACF blocks
The block.json file will look very familiar to you. It accepts all the same properties as dynamic blocks, with the addition of a few extras.
Here is our minimal block.json setup for the block we are creating. Go ahead and add this to your file now:
{
  "name": "acf/acf-cta",
  "title": "ACF call to action",
  "description": "A simple call to action block powered by ACF",
  "category": "formatting",
  "icon": "align-center",
  "acf": {
      "mode": "preview",
      "renderTemplate": "render.php"
  },
  "supports": {
    "anchor": true
  },
  "style": ["file:./style.css"]
}
Most of this should look very familiar. Two quick things to point out though.
First, we do not have to add any “attributes”. This is because all our content like the image and headings will be handle for us by ACF.
Second, you’ll notice the “acf” key that has a couple extra settings. You can view the full list of additional settings and what they do in the ACF documentation. For now, we are just pointing the renderTemplate to our php template file (in the same directory) and setting the default mode to preview. You’ll see what “mode” does once we actually start working with our block in the editor!
It’s important to note, you can add a lot of the functionality we’ve covered in previous lessons like block context and block supports just as you would with dynamic blocks. You can see we already have the anchor support enabled above and are pointing to our css asset as well.
This handles our basic block setup, now lets build our render template!
Building the render template for our ACF Block
Jump into your render.php file and add the following comment right off the bat:
<?php
/**
 * ACF Call to action Block template.
 *
 * @param array $block The block settings and attributes.
 * @param string $content Inner blocks content if jsx is enabled
 * @param boolean $is_preview True during preview render
 * @param array $context any context variables from parent blocks if applicable
 */
I always like to include this in my PHP render templates, so that I remember the variables that WordPress and ACF make available within this file.
For this block we actually won’t need to access any of these, but as you build more advanced blocks, its nice to have them handy!
After the comment, the first thing I like to do is define all the data the block will need:
// ... Comment above

// Load values and assign defaults.

$layout_variant = get_field("layout_variant");
$image = get_field("image");
$heading = get_field("heading");
$body = get_field("body");
$link = get_field("link");
We haven’t yet built these fields in ACF, but I like to define it here as if they already exist, because often this will help me think through the data structure before jumping into the ACF admin interface.
Below this we can drop out of php and build our template, so the full file will look like this:
<?php
/**
 * ACF Call to action Block template.
 *
 * @param array $block The block settings and attributes.
 * @param string $content Inner blocks content if jsx is enabled
 * @param boolean $is_preview True during preview render
 * @param array $context any context variables from parent blocks if applicable
 */


// Load values and assign defaults.

$layout_variant = get_field("layout_variant");
$image = get_field("image");
$heading = get_field("heading");
$body = get_field("body");
$link = get_field("link");

?>

<div <?php echo get_block_wrapper_attributes(["class" => 'acf-cta-block variant-' . $layout_variant]); ?>>
	<div class="cta-image-container">
		<?php echo wp_get_attachment_image( $image, "full" ); ?>
	</div>
	<div class="cta-text-container">
		<h2><?php echo esc_html($heading) ?></h2>
		<p><?php echo esc_html($body) ?></p>
    <?php if(!empty($link)): ?>
		<a target="<?php echo esc_attr($link["target"]) ?>" href="<?php echo esc_attr($link["url"]) ?>" class="wp-element-button">
			<?php echo esc_html($link["title"]) ?>
		</a>
    <?php endif; ?>
	</div>
</div>
If you followed the dynamic block tutorial, this is the same markup tweaked a bit to use ACF data instead.
Adding CSS to ACF Blocks
One of the coolest things about ACF blocks is that we can create them without any kind of build process.
I’m normally working within a context where I already am using @wordpress/scripts or something similar, so this is not a huge deal, but sometimes you may be working on a site where adding a build process is going to create lots of extra overhead. In this case, ACF blocks are a great way to take advantage of the block editor without that extra complication.
For this demo, I’ll show using just a vanilla css file, so you can see how it works.
Go ahead and copy these styles into your style.css file:
/**
 * The following styles get applied both on the front of your site
 * and in the editor.
 *
 * Replace them with your own styles or remove the file completely.
 */

.acf-cta-block {
	display: flex;
	width: 100%;
	justify-content: center;
	align-items: center;
}


.acf-cta-block .cta-image-container {
  width: 70%;
  align-self: stretch;
  position: relative;
  background: #e5e5e5;
}

.acf-cta-block img {
  position: absolute;
  height: 100%;
  width: 100%;
  object-fit: cover;
  top: 0;
  left: 0;
}

.acf-cta-block .cta-text-container {
  box-sizing: border-box;
  width: 50%;
  margin-left: -20%;
  margin-top: 50px;
  margin-bottom: 50px;
  z-index: 2;
  background: white;
  box-shadow: 4px 0px 20px rgb(0,0,0,0.15);
  border-radius: 16px;
  padding: 50px 32px;
}

.acf-cta-block h2 {
  margin-top: 0;
}

.acf-cta-block .wp-element-button {
  display: inline-block;
}


.acf-cta-block.variant-text-left {
  flex-direction: row-reverse;
}

.acf-cta-block.variant-text-left .cta-image-container {
  justify-content: flex-end;
}

.acf-cta-block.variant-text-left .cta-text-container {
  margin-left: 0%;
  margin-right: -20%;
}

@media (max-width: 768px){

  .acf-cta-block.variant-text-left, .acf-cta-block.variant-text-right {
    flex-direction: column;
  }

  .acf-cta-block .cta-image-container {
    width: 100%;
    aspect-ratio: 1.25;
  }

  .acf-cta-block .cta-text-container {
    width: 90%;
    margin-left: 0;
    margin-top: -50px;
  }
}
This is all fairly straightforward css so I won’t spend time digging into it, but feel free to take a closer look if you want.
Because we are pointing to this file from block.json, it will automatically get loaded both on the front end, and in the editor context as well.
At this point all our files are setup, if this were a traditional block we would jump into an “editor.js” file and start building the block editor interface. For ACF blocks, we can skip this and instead head to the WordPress dashboard to configure our fields within ACF.
Configuring our block settings using Advanced Custom Fields
Go ahead and jump into your WordPress admin. First, make sure you activate your new block plugin! This way ACF will be able to recognize that this new custom block exists.
Once your plugin is active you can navigate to the ACF settings page and click “Add new field group”.
BEFORE you spend time configuring a bunch of fields, scroll to the bottom and make sure ACF is reading your custom block correctly by setting the display settings to show the fields only on your block.
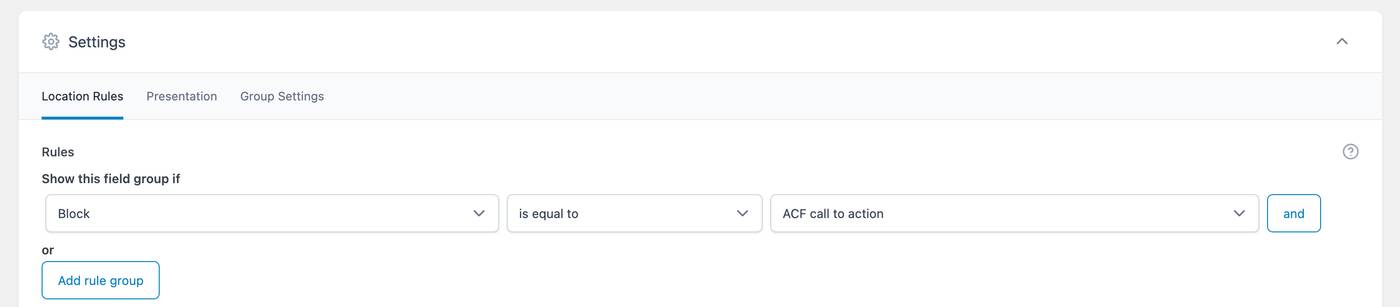
If your block does not appear in the dropdown, something is wrong with your block registration or your plugin may not be active, double check and then return and try again.
We’ll go ahead and setup our fields to match what we setup in the block template php file:
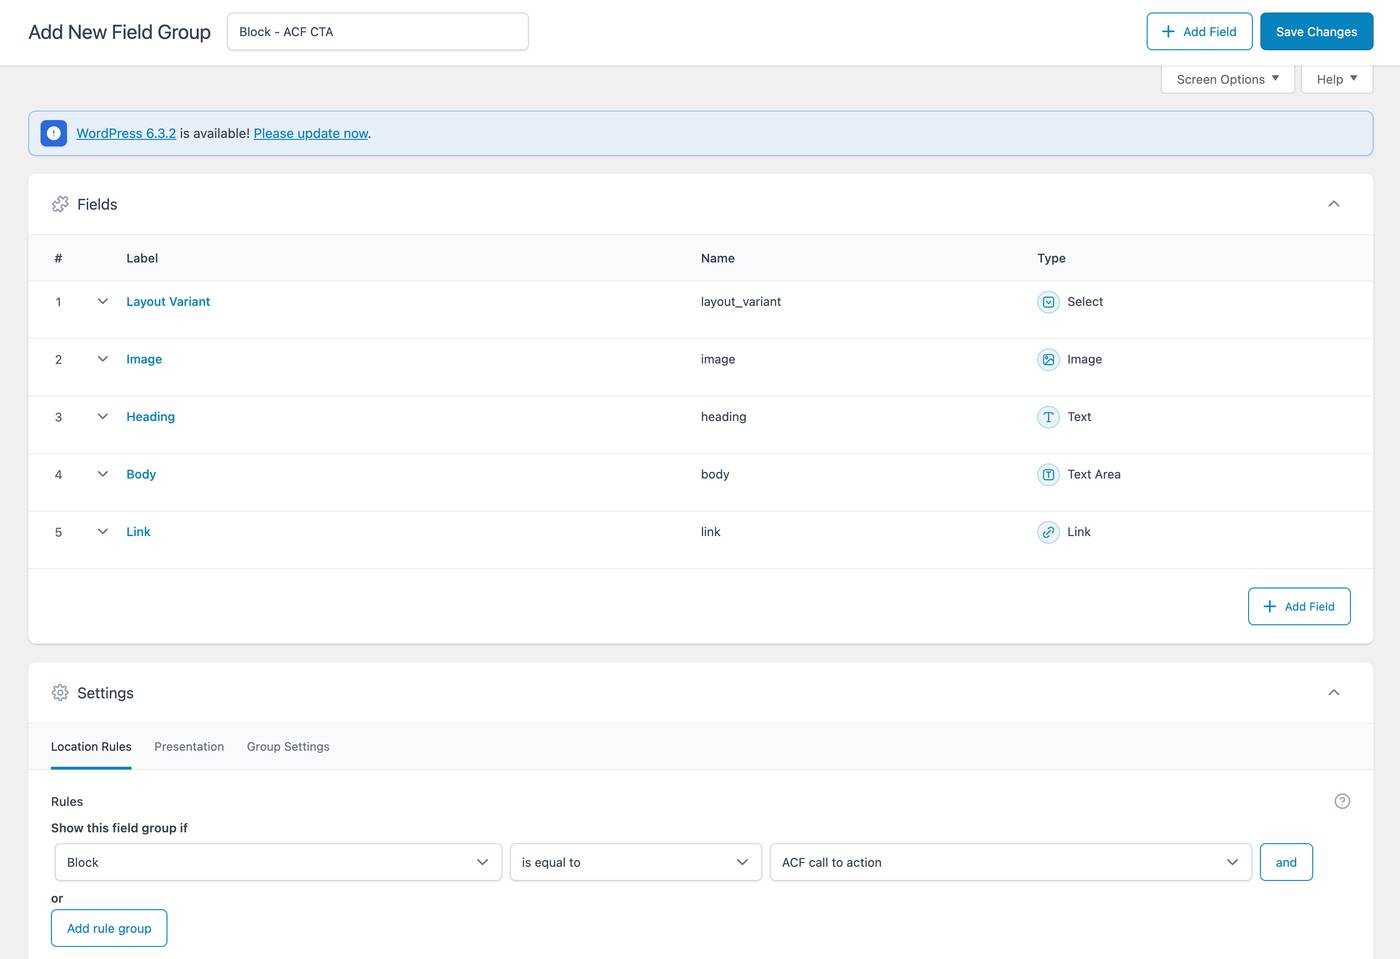
I usually prefix my field group name with “Block-” just so I can quickly see all my block related custom fields.
A couple notes for our specific fields:
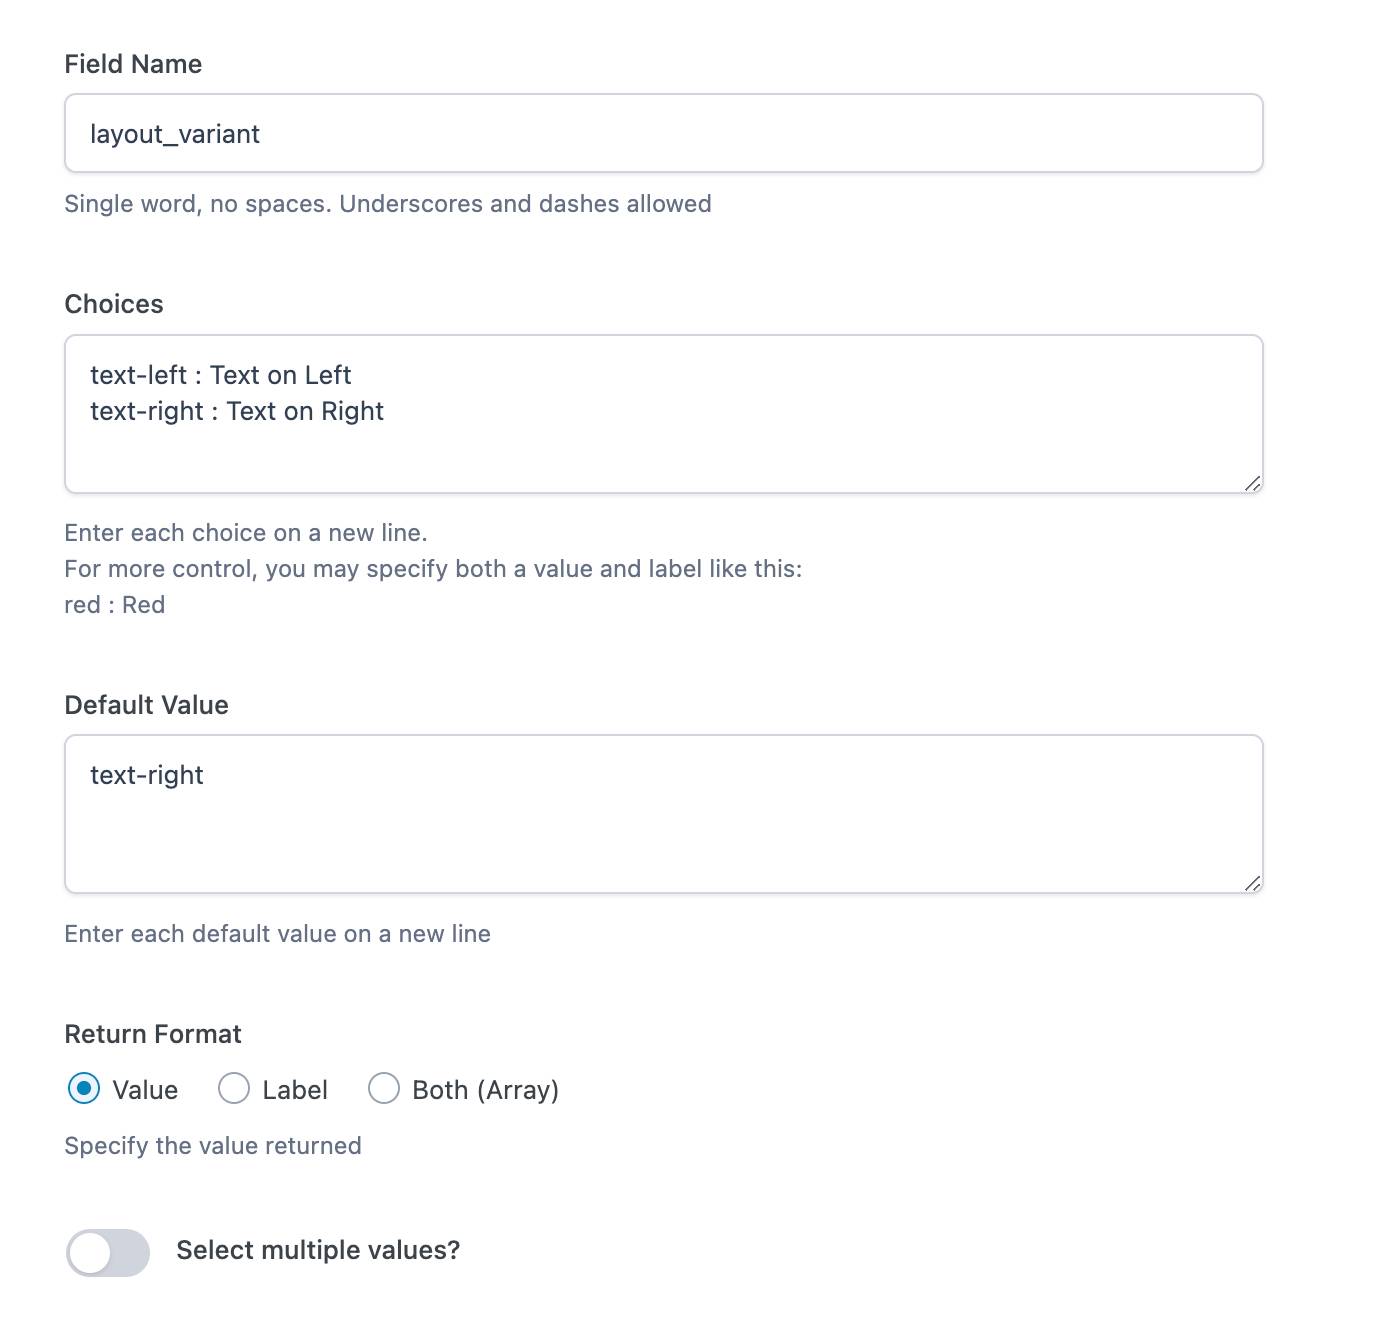
For the layout_variant field make sure to configure the options like so – the returned value is used to generate a CSS class:
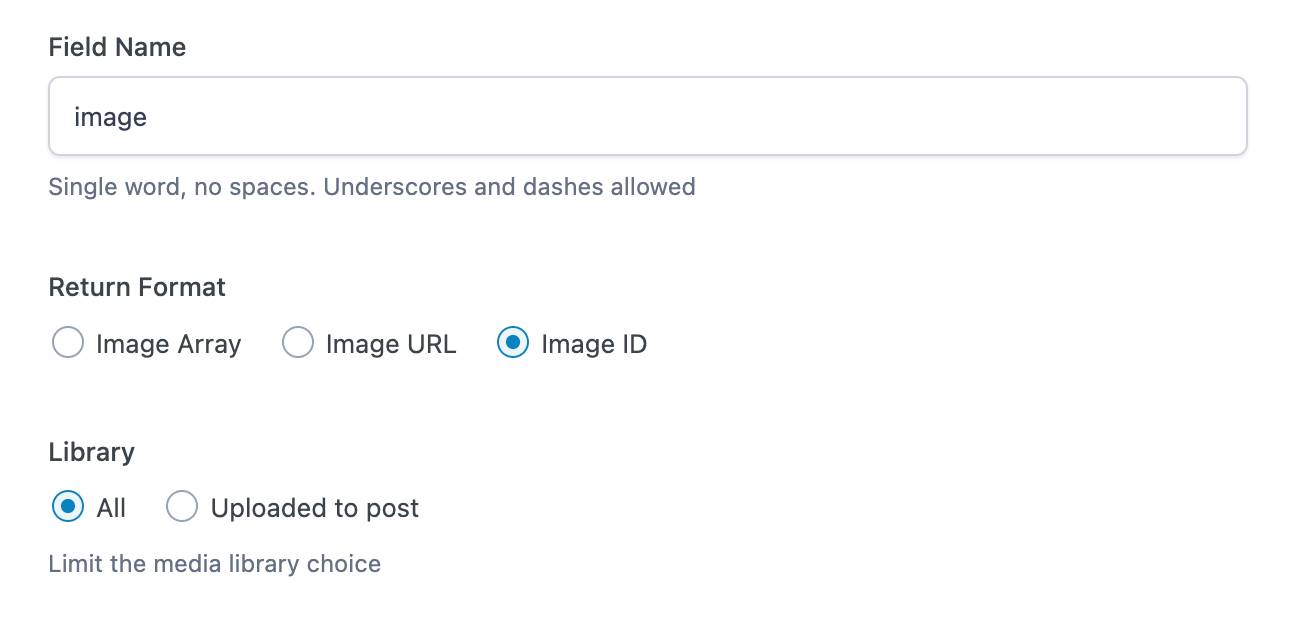
For the image field make sure to set the return type to image ID. This is what our render template is expecting (though you could always set it up differently to handle an image object if you prefer):
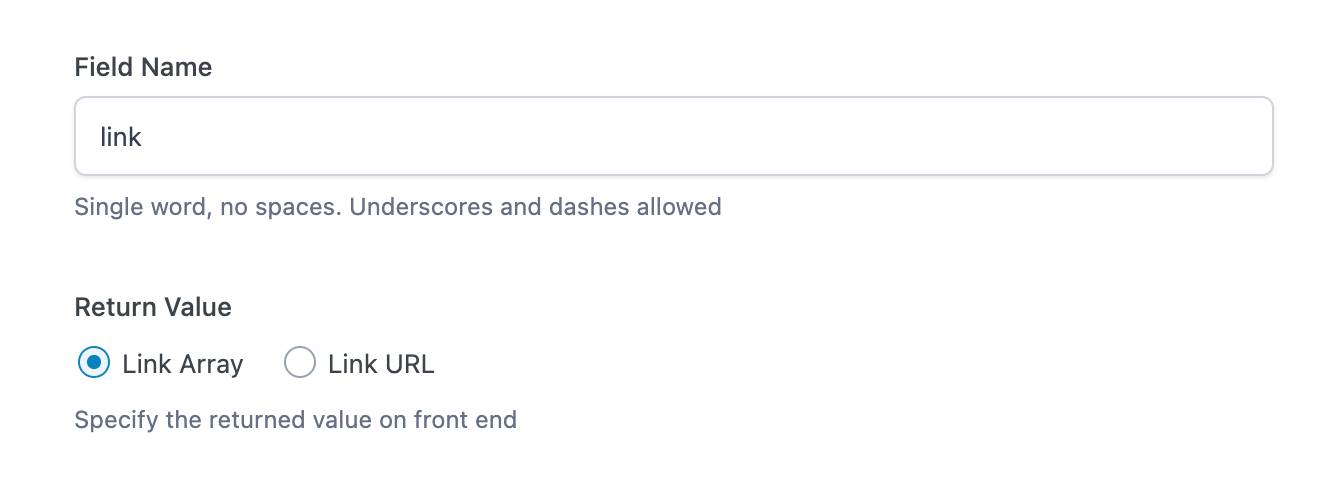
Finally, for the link field set the return type to array, again we set up our template to expect this format:
Once all your settings are ready, you can click “Save Changes” and now our block is ready to go!
Testing out our new ACF block
Go ahead and create a page or post and drop in our new block:
You”ll notice right away this is a little bit different than dynamic blocks.
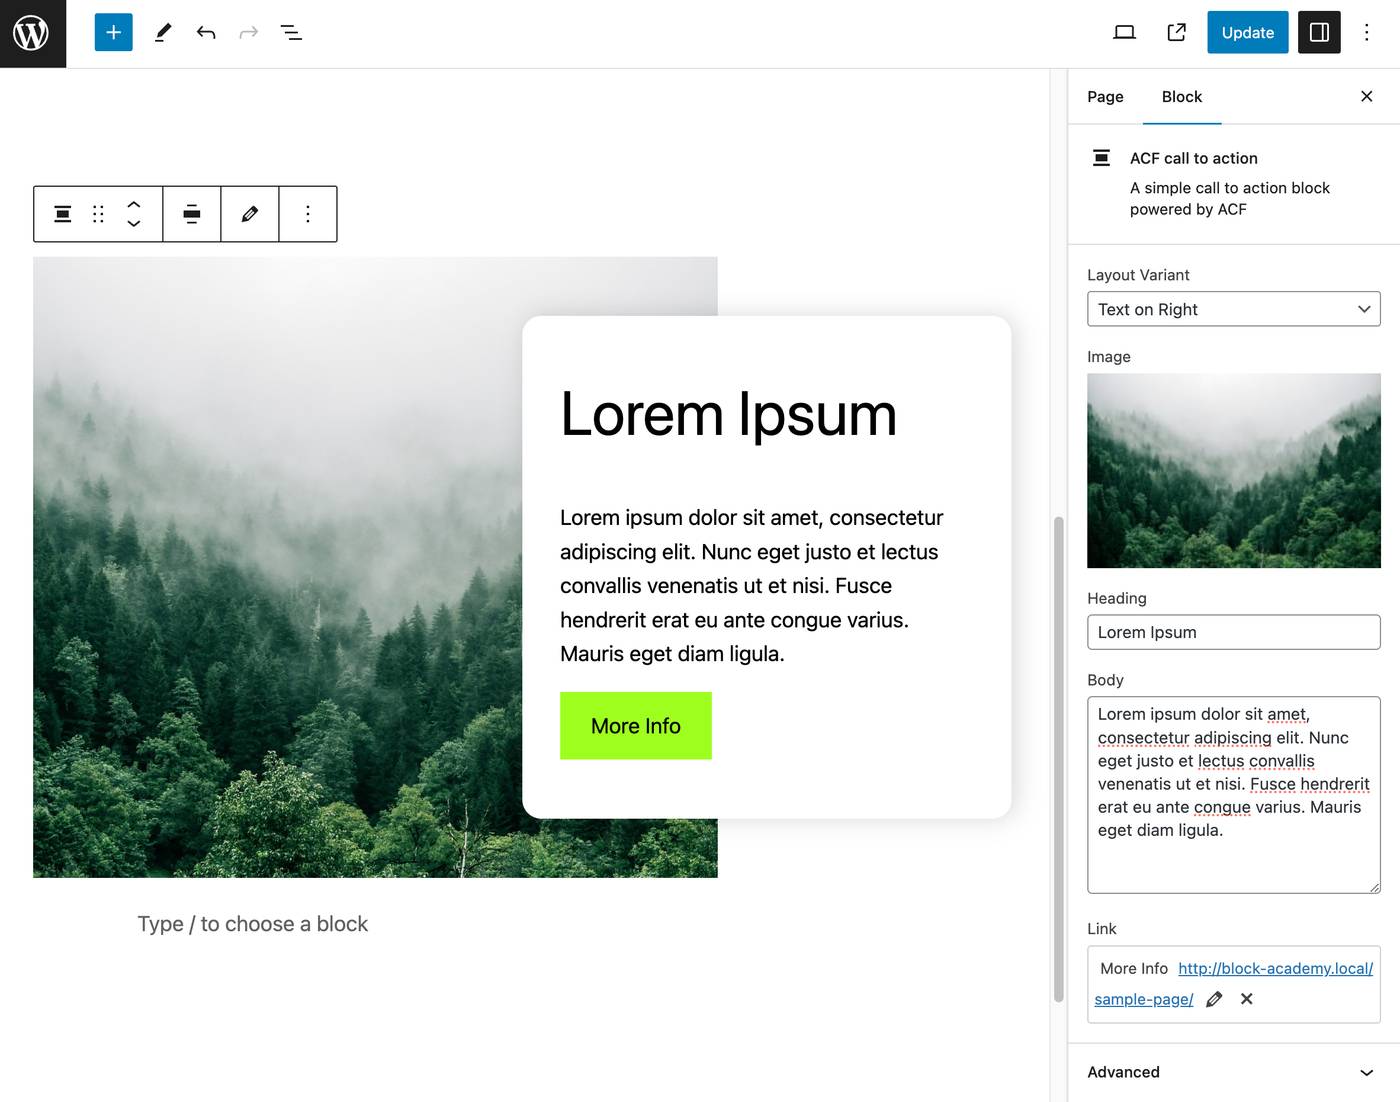
In the main editor window the block is rendered using the PHP template we created.
In the sidebar, you can see all our custom fields (in native blocks this would be in the InspectorControls component).
As you fill out the settings, you’ll see them rendered in real time:
This works, but the sidebar isn’t a whole lot of real estate to edit in.
You can click the pencil icon on the block to switch to “edit mode”. Now the realtime render is gone, and all our fields move out into the main editor window:
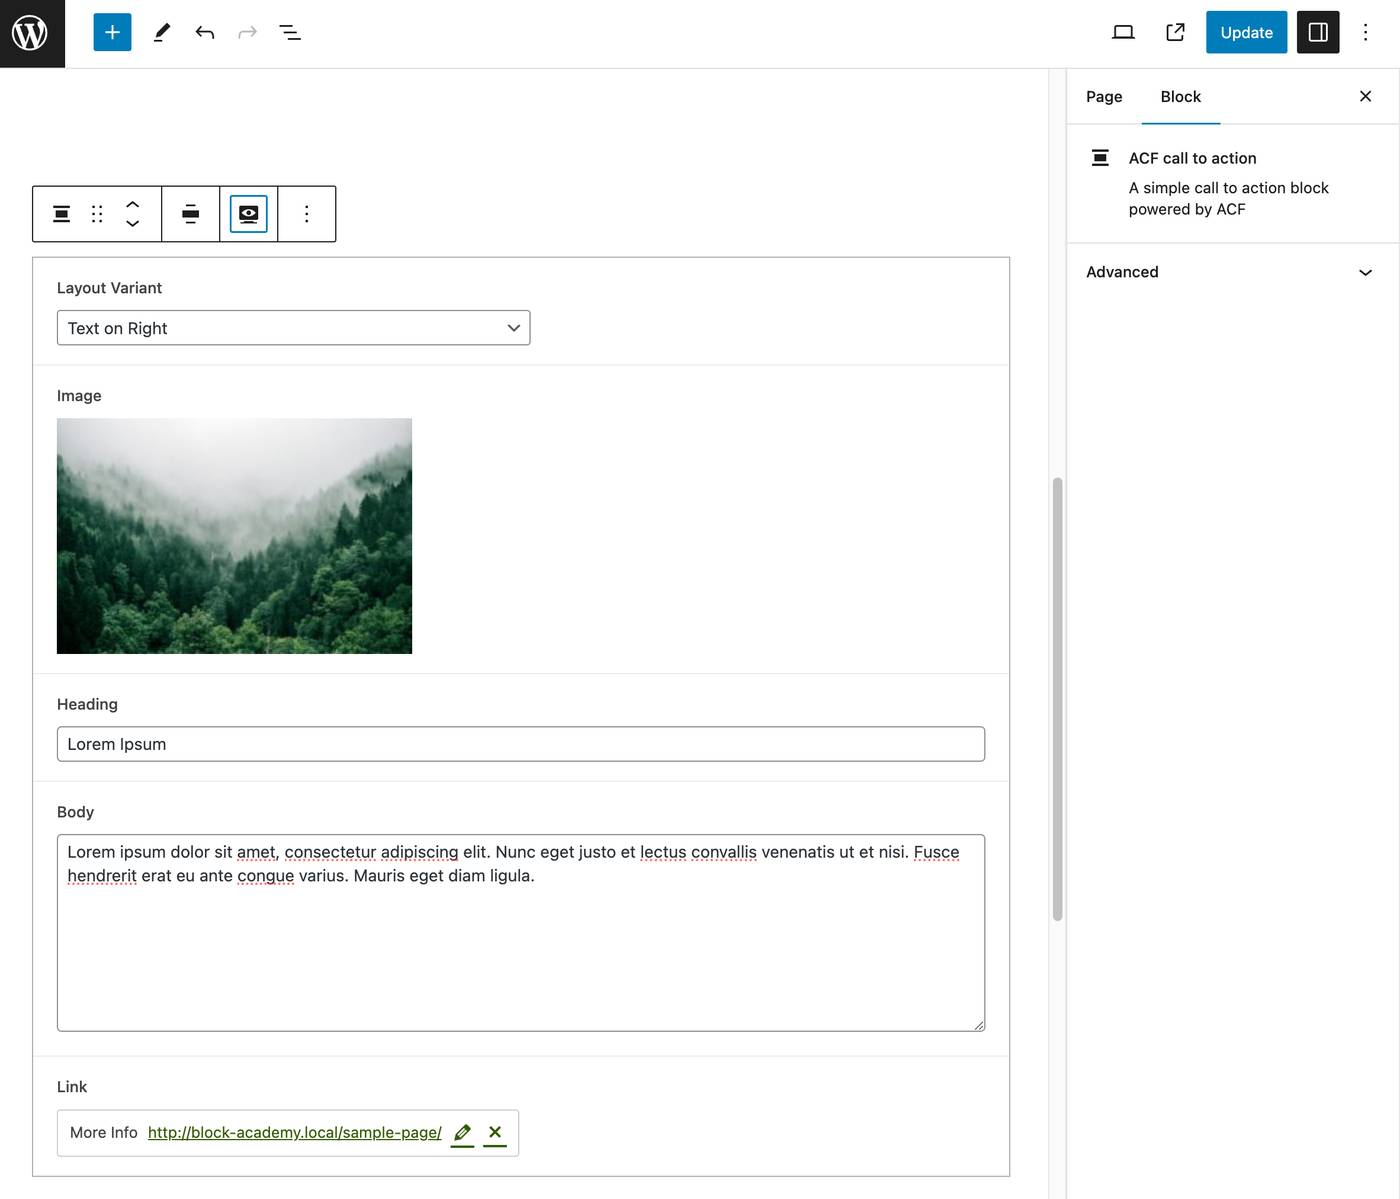
This is great if you have repeaters or flexible content and need more room to work.
You can actually control which view is the default for each block you create. Remember in our block.json file the “mode” property under our new “acf” properties? We can set this to one of three values: preview, edit, or auto.
Go ahead and save the page or post and view the front end. It should look exactly the same as in the editor.
Just like dynamic blocks, we can change our render template and it will update all instances of blocks across the site dynamically since they are rendered server-side.
At this point we’ve concluded building a simple ACF block from scratch! It’s amazing how simple this process is compared to looking back at dynamic blocks. Not to mention static blocks with deprecations to manage!
We could stop here, but I want to show a few other tips for getting the most out of ACF blocks.
Adding Block Supports to ACF Blocks
What if we want to be able to control the color of our text in this block?
We could add a ACF color picker field, but this is not the best way to go about this.
Instead, we can leverage block supports. These hook into our theme.json settings and already have access to the theme color palette by default!
Go ahead and add “color” to our supports in the block.json file:
  "supports": {
    "anchor": true,
    "color": {
      "text": true,
      "background": false
    }
  },
In this case, we’ll just enable text color.
Open the editor and select your block. You can open the styles pane and use the native WordPress color picker which will inherit the theme colors automatically!
Enjoying the read?
Join 500+ developers and learn modern WordPress, JAMStack, and javascript frameworks with a monthly development newsletter geared towards agencies and freelancers.
Using InnerBlocks with ACF Blocks
Remember during the dynamic block chapters of this course we ended up removing some of the controls and instead just allowing inner blocks? This saved us time from creating extra settings and controls manually, and made our block more flexible.
You can take the same approach with ACF blocks when it makes sense! I do tend to use InnerBlocks less with ACF, primarily because creating new settings fields is so easy. The flexibility you get with InnerBlocks can still be very useful though!
Imagine we want the ability to have multiple buttons in our block. One option is we could create a repeater field with a link field inside. Lets take a look at how we could accomplish this with InnerBlocks instead though.
First, we add jsx support to our block.json file:
  "supports": {
    "jsx": true,
    "anchor": true,
    "color": {
      "text": true,
      "background": false
    }
  },
Next, we jump into our render template file. With jsx support enabled we can add the <InnerBlocks /> tag wherever we want our block inserter.
For demo purposes, let’s go even further than just handling multiple buttons. We’ll actually empty out where our heading, body, and link are. We can handle all of these with a heading block, paragraph block, and buttons block instead.
We can also comment out where we are reading the old heading, body, and link fields into variables. In the real world, you would also delete these fields in the dashboard, but we’ll skip that for this demo:
<?php
/**
 * ACF Call to action Block template.
 */

// Load values and assign defaults.

$layout_variant = get_field("layout_variant");
$image = get_field("image");
// $heading = get_field("heading");
// $body = get_field("body");
// $link = get_field("link");

?>

<div <?php echo get_block_wrapper_attributes(["class" => 'acf-cta-block variant-' . $layout_variant]); ?>>
	<div class="cta-image-container">
		<?php echo wp_get_attachment_image( $image, "full" ); ?>
	</div>
	<div class="cta-text-container">
        <InnerBlocks />
	</div>
</div>
Awesome. At this point if you save and check out the block in the editor. You should now be able to insert blocks into the content area!
We can improve on this a lot though. Right now, it starts blank and you can insert any block – some of which could break this layout.
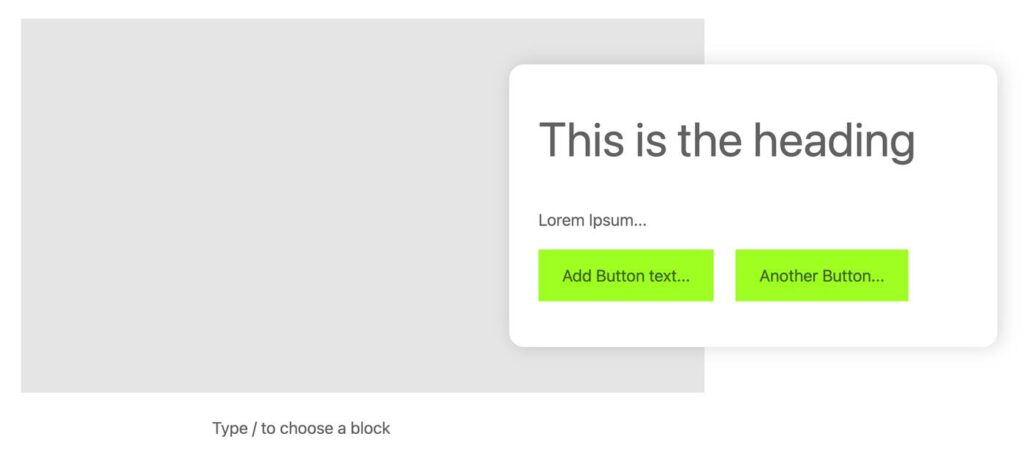
We can define a template and a list of allowed blocks to get this under control:
// ... our variables are defined above

$allowedBlocks = [ 'core/buttons', 'core/paragraph', 'core/heading', 'core/list' ];

$template = [
    ['core/heading', ["placeholder"=> "This is the heading"]],
    ['core/paragraph', ["placeholder" =>  "Lorem Ipsum..."]],
    ['core/buttons', [],
        [
            ['core/button', ["placeholder" => "Add Button text..."]],
            ['core/button', ["placeholder" => "Another Button..."]],
        ]
    ],
];

?>

<div <?php echo get_block_wrapper_attributes(["class" => 'acf-cta-block variant-' . $layout_variant]); ?>>
	<div class="cta-image-container">
		<?php echo wp_get_attachment_image( $image, "full" ); ?>
	</div>
	<div class="cta-text-container">
        <InnerBlocks
            template="<?php echo esc_attr( wp_json_encode( $template ) ) ?>"
            allowedBlocks="<?php echo esc_attr( wp_json_encode( $allowedBlocks ) )  ?>"
        />
	</div>
</div>
We have to pass our template and allowed blocks with json_encode because these attributes are actually pulled out and interpreted with javascript behind the scenes in the block editor.
For the template itself, you can actually build out the starter blocks you want in the editor, then use this conversion tool to generate the PHP array version of your block markup for you.
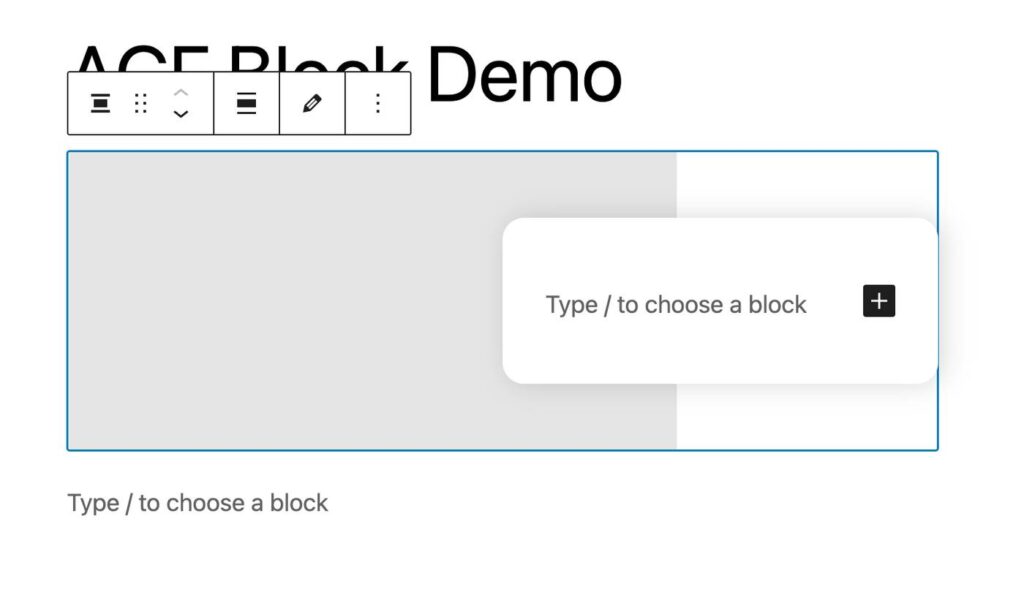
Now go ahead and refresh the editor. You should see the block populate with some starter inner blocks. When we insert more blocks it is also limited to only the allowed blocks we defined.
One other option available to you is template locking for InnerBlocks. This restricts the ability to add or move blocks as well. This can be useful for locked down layouts you don’t want content editors accidentally messing up.
You can read more about all the block locking options in the WordPress documentation.
NOTE: Using InnerBlocks is not necessarily better than using ACF fields, it all just depends on the use case.
Generally, if you want more locked down designs I would opt for using all ACF fields. Its more straightforward than template locking and gives you granular control. If you are looking for flexibility and find yourself needing repeaters or flexible content fields, InnerBlocks may simplify things and be a better route.
Wrapping up
Congratulations!
Once you understand dynamic blocks, making the jump to ACF blocks is actually super intuitive. Almost everything from dynamic blocks still applies, but you don’t have to worry about the editor interface as much anymore.
I really wanted to show a block setup without any compilation in this lesson. I think that is a huge benefit of ACF blocks.
That said, some of you may want to set up a plugin where you can use @wordpress/scripts. This would allow you to use modern tooling like post-css or sass for our styles and compiled javascript.
In the next lesson we’ll cover a setup for compilation and creating multiple ACF blocks within a plugin or custom theme.

Leave a Reply