With the latest version of WordPress even more power has been shifted from the traditional add_theme_support to the theme.json file.
For theme developers new to Gutenberg his can be pretty confusing, but once you understand how to use this file it can be extremely empowering for rapid development.
Using Theme.json you can lock down core component blocks to use exactly what fonts, sizes, and colors you want from a brand guide. Simultaneously empowering content editors to have a flexible system at their disposal, while ensuring no one strays too far from the brand.
A common agency approach is to immediately disable all core Gutenberg blocks and only allow custom blocks that rigidly follow the brand.
The theme.json will get many projects locked down enough, without requiring basic things like headings and buttons to be recreated from scratch.
This has the added bonus of keeping the site in the WordPress upgrade pipeline, so new functionality will be available as it is released.
The Theme.json is broken into two major parts (there are other top level sections as well, but this will focus on the primary two).
- Settings: In this section you can define how the editor behaves in the admin. Including color palette, font size options, and disable things like border radius on a block level.
- Style: Here you can use the colors, fonts, and spacing styles you have in the settings section to actually impact how elements look on the front end. WordPress will output css variables on the body tag following a format like —wp—settings—color—blue that are used to style the rest of the elements
Basic Setup for a Bespoke Theme with Theme.json
How you approach this file largely depends on how much control you want the end user of Gutenberg to have, but in general the less you touch it the more options are available.
In many cases for agency/freelance theme developers more options is a bad thing, so in the following section I’m going to walkthrough how I set up the theme.json to disable a lot of potentially problematic options and leave a nice balance of brand compliant core Gutenberg blocks.
Starting point:
{
  "version": 2,
  "settings": {},
  "styles": {}
}
Version 2 tells WP to use the latest Theme.json standards
Color
To start out, we can disable the custom color picker, as well as the gradient options to keep people from adding non-brand colors.
{
  "version": 2,
  "settings": {
    "color": {
      "custom": false,
      "customGradient": false
    }
  }
}
Then let’s add back in a custom color palette of our choosing, I’ll do a basic one with a primary/secondary.
{
  "version": 2,
  "settings": {
    "color": {
      "custom": false,
      "customGradient": false,
      "palette": [
        {
          "slug": "primary",
          "color": "#0d3b66",
          "name": "Primary Blue"
        },
        {
          "slug": "secondary",
          "color": "#ee964b",
          "name": "Secondary"
        },
        {
          "slug": "white",
          "color": "#ffffff",
          "name": "White"
        },
        {
          "slug": "black",
          "color": "#333333",
          "name": "Black"
        }
      ]
    }
  }
}
Just for fun, lets add our own gradient option in too:
{
  "version": 2,
  "settings": {
    "color": {
      "custom": false,
      "customGradient": false,
      "palette": [
        {
          "slug": "primary",
          "color": "#0d3b66",
          "name": "Primary Blue"
        },
        {
          "slug": "secondary",
          "color": "#ee964b",
          "name": "Secondary"
        },
        {
          "slug": "white",
          "color": "#ffffff",
          "name": "White"
        },
        {
          "slug": "black",
          "color": "#333333",
          "name": "Black"
        }
      ],
      "gradients": [
	{
	  "slug": "gradient1",
	  "gradient": "linear-gradient(45deg,
                      var(--wp--preset--color--secondary),
                      var(--wp--preset--color--primary))",
	  "name": "Gradient 1"
	}
      ]
    }
  }
}
Typography
Again, let’s remove a bunch of the customization options WordPress allows by default so that content editors don’t go too wild.
{
  "version": 2,
  "settings": {
    "typography": {
      "customFontSize": false,
      "dropCap": false,
      "fontWeight": false,
      "fontStyle": false,
      "textTransform": false,
      "textDecoration": false
    }
  }
}
Next, let’s set some custom fonts. I will use the System Font Stack which I’m a big fan of for lightweight sites that feel native on devices.
{
  "version": 2,
  "settings": {
    "typography": {
      "customFontSize": false,
      "dropCap": false,
      "fontWeight": false,
      "fontStyle": false,
      "textTransform": false,
      "textDecoration": false,
      "fontFamilies": [
        {
          "fontFamily": "-apple-system,BlinkMacSystemFont,\"Segoe UI\",Roboto,Oxygen-Sans,Ubuntu,Cantarell, \"Helvetica Neue\",sans-serif",
          "slug": "sans-serif",
          "name": "Sans Serif"
        },
        {
          "fontFamily": "\"Iowan Old Style\", \"Apple Garamond\", Baskerville, \"Times New Roman\", \"Droid Serif\", Times, \"Source Serif Pro\", serif, \"Apple Color Emoji\", \"Segoe UI Emoji\", \"Segoe UI Symbol\"",
          "slug": "serif",
          "name": "Serif"
        },
        {
          "fontFamily": "Menlo, Consolas, Monaco, \"Liberation Mono\", \"Lucida Console\", monospace",
          "slug": "mono",
          "name": "Monospace"
        }
      ]
    }
  }
}
Let’s also add font sizes. I base mine exactly off the tailwind.css typography utility classes, so that it is easy for me to remember and pairs well with tailwind when I choose to use it.
"fontSizes": [
        {
          "slug": "base",
          "size": "1rem",
          "name": "base"
        },
        {
          "slug": "lg",
          "size": "1.125rem",
          "name": "lg"
        },
        {
          "slug": "xl",
          "size": "1.25rem",
          "name": "xl"
        },
        {
          "slug": "2xl",
          "size": "1.5rem",
          "name": "2xl"
        },
        {
          "slug": "3xl",
          "size": "1.875rem",
          "name": "3xl"
        },
        {
          "slug": "4xl",
          "size": "2.25rem",
          "name": "4xl"
        },
        {
          "slug": "5xl",
          "size": "3rem",
          "name": "5xl"
        },
        {
          "slug": "6xl",
          "size": "3.75rem",
          "name": "6xl"
        },
        {
          "slug": "7xl",
          "size": "4rem",
          "name": "7xl"
        }
      ],
Custom
Under custom we can also define variable to use later in our styling section. I’m going to add a custom line height options that we can use for our default heading styles in the next section. Again, I’m mirroring Tailwind here, but you can choose names and values that make sense for you.
    "custom": {
		"typography": {
		  "line-height": {
                     "none": 1,
		     "tight": 1.25,
		     "snug": 1.375,
		     "normal": 1.75,
		     "relaxed": 1.625,
                     "loose": 2
		    }
		  }
		},
Blocks
This section is where you can really get crazy with granularity. You can override and control options on a per block level. The one I always focus on here is the buttons block because the default options give WAY too much control.
You can see this is a lot of settings, but you can usually reuse this chunk every time to get a barebones button block that you can then style however you want for the brand.
"blocks": {
"core/button": {
"border": {
"color": false,
"radius": false,
"style": false,
"width": false
},
"color":{
"text": false,
"background": false,
"customDuotone": false,
"customGradient": false,
"defaultDuotone": false,
"defaultGradients": false,
"duotone": [],
"gradients": [],
"palette": []
},
"typography": {
"fontSizes": [],
"fontFamilies": []
}
},
"core/heading": {
"color": {
"text": false,
"background": false
},
"typography": {
"fontSizes": [],
"fontFamilies": [],
"letterCase": false,
"letterSpacing": false
}
}
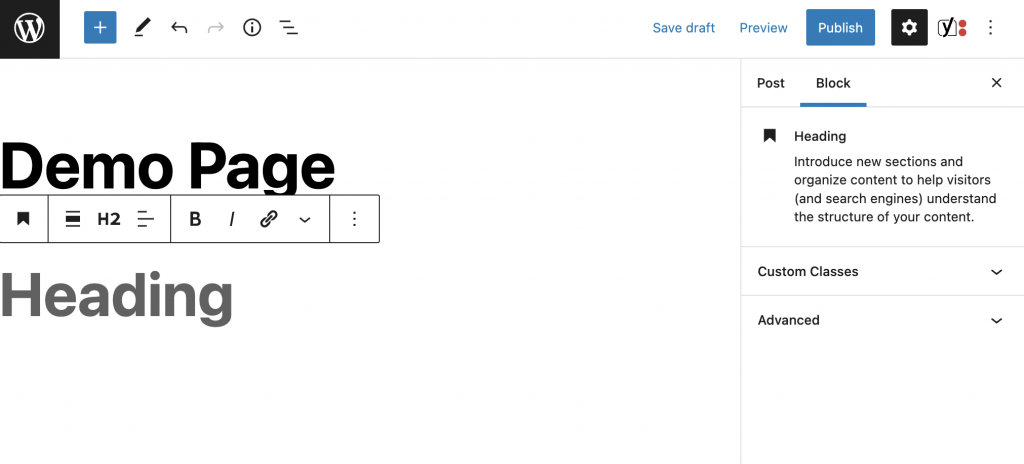
}Results
Now you have headings and buttons that just work. No crazy extra options.
Moving on to Theme.json Styles
The next step is to make sure our atomic components look good on the front end. We’ll move into the “styles” section which is at the same level as the “settings” object we’ve been putting stuff into above.
First let’s just set our global font size. Below you can see the syntax WordPress uses. These css variables are output based on what you define in the settings section above!
  "styles": {
    "typography": {
      "fontSize": "var(--wp--preset--font-size--base)"
    }
  }
Now we can jump in and actually style by element. Lets start with headings:
"styles": {
    "typography": {
      "fontSize": "var(--wp--preset--font-size--base)"
    },
    "elements": {
      "h1": {
          "typography": {
              "fontSize": "var(--wp--preset--font-size--7-xl)",
              "fontFamily": "var(--wp--preset--font-family--sans-serif)",
              "fontWeight": "700",
              "lineHeight": "var(--wp--custom--typography--line-height--tight)"
          }
      },
      "h2": {
        "typography": {
          "fontSize": "var(--wp--preset--font-size--6-xl)",
          "fontFamily": "var(--wp--preset--font-family--sans-serif)",
          "fontWeight": "700",
          "lineHeight": "var(--wp--custom--typography--line-height--tight)"
        }
      },
      "h3": {
        "typography": {
          "fontSize": "var(--wp--preset--font-size--5-xl)",
          "fontFamily": "var(--wp--preset--font-family--sans-serif)",
          "fontWeight": "300",
          "lineHeight": "var(--wp--custom--typography--line-height--tight)"
        }
      },
      "h4": {
        "typography": {
          "fontSize": "var(--wp--preset--font-size--4-xl)",
          "fontFamily": "var(--wp--preset--font-family--serif)",
          "fontWeight": "700",
          "lineHeight": "var(--wp--custom--typography--line-height--snug)"
        }
      },
      "h5": {
        "typography": {
          "fontSize": "var(--wp--preset--font-size--3-xl)",
          "fontFamily": "var(--wp--preset--font-family--serif)",
          "fontWeight": "700",
          "lineHeight": "var(--wp--custom--typography--line-height--snug)"
        }
      },
      "h6": {
        "typography": {
          "fontSize": "var(--wp--preset--font-size--2-xl)",
          "fontFamily": "var(--wp--preset--font-family--sans-serif)",
          "fontWeight": "300",
          "lineHeight": "var(--wp--custom--typography--line-height--normal)"
        }
      }
    }
  }
You can see we are using that custom line-height property we defined above for these.
We can also go ahead and style links, even the hover states!
"link": {
        "color": {
            "text": "var(--wp--preset--color--primary)"
        },
        ":hover": {
            "color": {
                "text": "var(--wp--preset--color--secondary)"
            }
        }
      }
We can even dive in and style elements within certain blocks! Below we are customizing the button block, but you can go super deep and customize headings within the cover block, text styles in the quote block, etc.
    "blocks": {
      "core/button": {
        "color": {
          "text": "var(--wp--preset--color--white)",
          "background": "var(--wp--preset--color--primary)"
        }
      }
    }
While you can style the buttons this way, I actually prefer to create custom block styles for the buttons. Block styles are an excellent way to provide the user with clear options that offer a finite amount of choices that are pre-styled by the developer.
Results
Now we have a theme that is equipped with brand compliant building blocks without really touching any code, just plain json!
Our text and button blocks give the user a very limited option set and behave more like bespoke custom blocks, but are still core WordPress and will continue to receive updates as WP Gutenberg matures.
You can take this a lot farther and also customize Pull Quotes, Code blocks, and even more complex layout blocks like columns with custom text, spacing, etc. as well.
If you find your theme.json file getting a bit large and unwieldy, you can also split the theme.json file into multiple components to allow for better management of your settings.

Leave a Reply