One of the areas where the WordPress Gutenberg editor gets a lot of complaints is that it doesn’t really handle structured data.
A great example is a restaurant plugin where the restaurant posts contain the hours and days of the week the establishment is open, so that users can filter by this on the front end. This is more complex than a standard taxonomy like “cuisine” and is not a good fit for a custom block, since the data will be used to sort / filter, which would require parsing the block content.
Another example, which we will look at in this write up, is points of interest or store locations. We’ll create a custom post type that has an associated latitude and longitude, so that they can be displayed on an interactive map on the front end of the site.
For this kind of task, most theme developers will use ACF or Metabox Pro to add a couple fields to the custom post type. There is nothing wrong with this, and it is super quick, but you can actually handle Post Meta like this natively in Gutenberg with a custom sidebar. I think the result feels slicker and more integrated than having some fields tacked on at the bottom of the editor the way ACF/Metabox handle it.
Outline
This is a somewhat involved build, but will cover a lot of great concepts from CPT registration and creating custom post meta, to sidebars in the editor and using AJAX to build an interactive map from our posts.
The rough outline of what we’ll be doing is the following:
- Start building our plugin and register the “geopoint” post type
- Add a piece of post meta with latitude and longitude
- Build our editor script that registers a custom sidebar to edit the metadata
- Create a custom block to display the map of all our geopoints on the site
Getting Started
We’ll begin with some standard plugin boilerplate code. Go ahead and grab the starter code from this repository (the “start” branch) and add it to your plugins folder in a fresh WordPress install, or on a site you can experiment on.
We’ll add the following starter index.php file:
<?php
/**
 * Plugin Name:       FSD Geopoints
 * Plugin URI:        https://fullstackdigital.io
 * Description:       A plugin for a custom geopoint post type.
 * Version:           1.0.0
 * Requires at least: 5.9
 * Requires PHP:      7.2
 * Author:            Full Stack Digital
 * Author URI:        https://fullstackdigital.io
 * Text Domain:       fsd-gp
 */

if(!function_exists('add_action')) {
  echo 'Seems like you stumbled here by accident. 😛';
  exit;
}

// Setup
define('FSDGP_DIR', plugin_dir_path(__FILE__));
define('FSDGP_FILE', __FILE__);

// Includes
$rootFiles = glob(FSDGP_DIR . 'includes/*.php');
$subdirectoryFiles = glob(FSDGP_DIR . 'includes/**/*.php');
$allFiles = array_merge($rootFiles, $subdirectoryFiles);

foreach($allFiles as $filename) {
  include_once($filename);
}
This is the same code I use in all my plugin write ups. It first checks for the “add_action” function to make sure it is executing in the WordPress Context, then defines a couple constants, and finally includes all files within our includes folder.
Register the Post Type
The first step in our actual build is to register our custom post type. I’m just going to call it the “geopoints” post type, but you could call it “locations”, “stores”, “points of interest” or whatever best suits the application.
We’ll add the following hook in our main index.php file:
add_action('init', 'fsd_geopoint_post_type');Next, in the includes folder, create a file for the callback function we defined above. I’m calling mine “post-type.php”
function fsd_geopoint_post_type(){

  $labels = array(
		'name'                  => _x( 'Geopoints', 'Post type general name', 'fsd-gp' ),
		'singular_name'         => _x( 'Geopoint', 'Post type singular name', 'fsd-gp' ),
		'menu_name'             => _x( 'Geopoints', 'Admin Menu text', 'fsd-gp' ),
		'name_admin_bar'        => _x( 'Geopoint', 'Add New on Toolbar', 'fsd-gp' ),
		'add_new'               => __( 'Add New', 'fsd-gp' ),
		'add_new_item'          => __( 'Add New Geopoint', 'fsd-gp' ),
		'new_item'              => __( 'New Geopoint', 'fsd-gp' ),
		'edit_item'             => __( 'Edit Geopoint', 'fsd-gp' ),
		'view_item'             => __( 'View Geopoint', 'fsd-gp' ),
		'all_items'             => __( 'All Geopoints', 'fsd-gp' ),
		'search_items'          => __( 'Search Geopoints', 'fsd-gp' ),
		'parent_item_colon'     => __( 'Parent Geopoints:', 'fsd-gp' ),
		'not_found'             => __( 'No geopoints found.', 'fsd-gp' ),
		'not_found_in_trash'    => __( 'No geopoints found in Trash.', 'fsd-gp' ),
		'featured_image'        => _x( 'Geopoint Cover Image', 'Overrides the “Featured Image” phrase for this post type. Added in 4.3', 'fsd-gp' ),
		'set_featured_image'    => _x( 'Set cover image', 'Overrides the “Set featured image” phrase for this post type. Added in 4.3', 'fsd-gp' ),
		'remove_featured_image' => _x( 'Remove cover image', 'Overrides the “Remove featured image” phrase for this post type. Added in 4.3', 'fsd-gp' ),
		'use_featured_image'    => _x( 'Use as cover image', 'Overrides the “Use as featured image” phrase for this post type. Added in 4.3', 'fsd-gp' ),
		'archives'              => _x( 'Geopoint archives', 'The post type archive label used in nav menus. Default “Post Archives”. Added in 4.4', 'fsd-gp' ),
		'insert_into_item'      => _x( 'Insert into geopoint', 'Overrides the “Insert into post”/”Insert into page” phrase (used when inserting media into a post). Added in 4.4', 'fsd-gp' ),
		'uploaded_to_this_item' => _x( 'Uploaded to this geopoint', 'Overrides the “Uploaded to this post”/”Uploaded to this page” phrase (used when viewing media attached to a post). Added in 4.4', 'fsd-gp' ),
		'filter_items_list'     => _x( 'Filter geopoints list', 'Screen reader text for the filter links heading on the post type listing screen. Default “Filter posts list”/”Filter pages list”. Added in 4.4', 'fsd-gp' ),
		'items_list_navigation' => _x( 'Geopoints list navigation', 'Screen reader text for the pagination heading on the post type listing screen. Default “Posts list navigation”/”Pages list navigation”. Added in 4.4', 'fsd-gp' ),
		'items_list'            => _x( 'Geopoints list', 'Screen reader text for the items list heading on the post type listing screen. Default “Posts list”/”Pages list”. Added in 4.4', 'fsd-gp' ),
	);

	$args = array(
		'labels'             => $labels,
		'public'             => true,
		'publicly_queryable' => true,
		'show_ui'            => true,
		'show_in_menu'       => true,
		'show_in_rest'       => true,
		'query_var'          => true,
		'rewrite'            => array( 'slug' => 'geopoint', 'with_front' => false ),
		'capability_type'    => 'post',
		'has_archive'        => true,
		'hierarchical'       => false,
		'menu_position'      => 20,
		'supports'           => array( 'title', 'editor', 'author', 'thumbnail', 'excerpt', 'custom-fields'),
    'description'        => __('A custom geopoint post type', 'fsd-gp'),
	);

	register_post_type( 'geopoint', $args );

}
Most of this is just the boilerplate CPT registration provided by WordPress. One option to take note of is that we need “show_in_rest” set to true in order to fetch the posts for our javascript map.
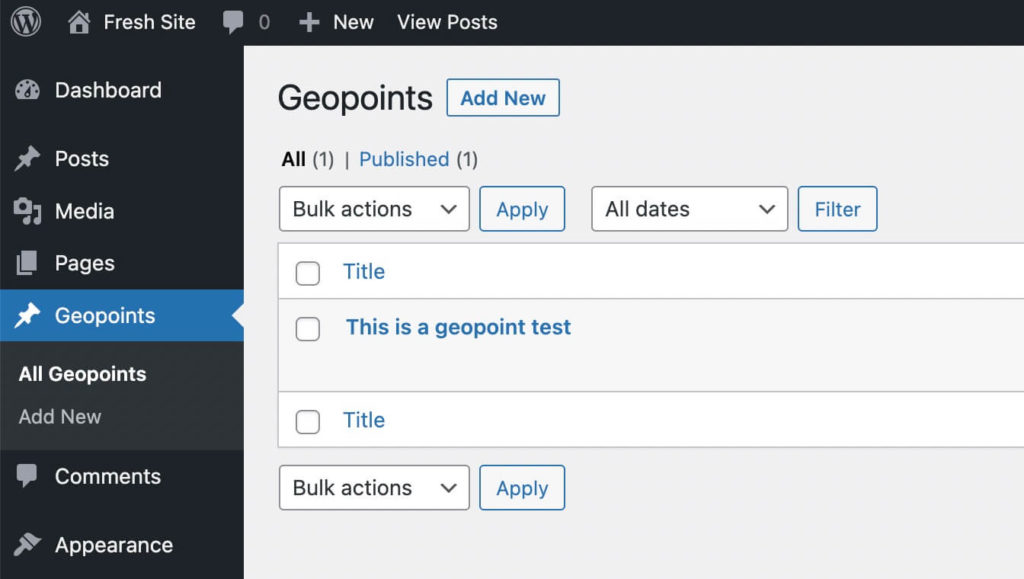
At this point if you activate your plugin and refresh the admin you should see a Geopoint option in the sidebar.
Custom Post Metadata
Now its time to add some custom metadata to our post type.
In the same function we defined to register the post type add the following:
function fsd_geopoint_post_type(){

 // Rest of function...

  register_post_type( 'geopoint', $args );

// NEW
  register_post_meta( 'geopoint', 'fsd_lat', [
		'single' => true,
		'type' => 'string',
		'show_in_rest' => true,
		'sanitize_callback' => 'sanitize_text_field', // we can define a custom endpoint to validate
		'auth_callback' => function(){
			return current_user_can( 'edit_posts' );
		}
	] );
  register_post_meta( 'geopoint', 'fsd_lng', [
		'single' => true,
		'type' => 'string',
		'show_in_rest' => true,
		'sanitize_callback' => 'sanitize_text_field', // we can define a custom endpoint to validate
		'auth_callback' => function(){
			return current_user_can( 'edit_posts' );
		}
	] );
  // END NEW
}
We are registering two new pieces of data: the latitude and longitude for our point.
Again, most of this is straight from the WordPress documentation, but we want to make sure “show_in_rest” is set to true.
We are using the simple “sanitize_text_field” callback, but you can also define your own sanitization function for complex data.
Creating our javascript file
Now that our custom post data is defined, we need a way to edit it.
We are going to create a custom sidebar in the Gutenberg editor for this post type. To do this, we need to create a javascript file that will be executed in the editor.
First, add an index.js file to the /src/ folder. For now, you can add the following:
console.log("hello from our editor script")We need to register this script and then enqueue it. In your main index.php file add the following:
add_action('init', 'fsd_register_assets');
add_action( 'enqueue_block_editor_assets', 'fsd_enqueue_block_editor_assets');
Now let’s create an “assets.php” file in our includes directory. We’ll add the following functions:
function fsd_register_assets(){

  $editorAssets = include(FSDGP_DIR . 'build/editor/index.asset.php');

  wp_register_script(
    'fsd_editor',
    plugins_url( '/build/editor/index.js', FSDGP_FILE ),
    $editorAssets['dependencies'],
    $editorAssets['version'],
    true
  );
}

function fsd_enqueue_block_editor_assets() {
    wp_enqueue_script( 'fsd_editor' );
}
You might be a little confused at this point. Why are we pointing to a build folder and what is this index.asset.php?
If you’ve followed my other tutorials you know exactly what we are about to do.
WordPress provides us an excellent package called @wordpress/scripts to bundle scripts that will also track version and dependencies automatically for us in an asset.php file.
If you downloaded the starter files you should already have a package.json ready to go. Just run the following in your terminal at the root plugin directory:
npm installThen we can start the dev server with:
npm run startYou should now see a build folder generated with your output index.js.
At this point we can open the admin again and navigate to any post we want and open the editor. If you open the inspector you’ll see our console log.
Wait a minute though….
We don’t want our script to run on every instance of the editor – we don’t want a geopoints sidebar when we are editing pages for instance.
Luckily it’s easy to conditionally display. Take a look at the modified version or our enqueue function:
function fsd_enqueue_block_editor_assets() {
  $current_screen = get_current_screen(  );

  // Uncomment these if you want to check all the data available within $current_screen
  // var_dump($current_screen);
  // die();

  if($current_screen->post_type == "geopoint"){
    wp_enqueue_script( 'fsd_editor' );
  }

}
We use get_current_screen() to fetch some context and check if the post type is “geopoint”.
In the commented out code is a quick and easy way to just dump all the data that get_current_screen returns. Using this, you can modify this conditional check to fit your needs in the future.
Go ahead and do a quick test. Open the editor for a page, and then create a geopoint post and open the editor. You should only see our console log in the geopoint post. If so, great! you are ready to build the sidebar.
Register a custom sidebar
Open up your index.js file we created in the last step.
We’ll start by importing a few things from WordPress:
// Similar to the registerBlock function, but allows us to create sidebars
import {registerPlugin} from "@wordpress/plugins"

// Main component for our sidebar - can set options like title and icon
import {PluginSidebar} from "@wordpress/edit-post";

// Sub components that will like in our PluginSidebar for editing the metadata
import {PanelBody, TextControl} from '@wordpress/components'

// Functions to interact with the WP data layer so we can grab our metadata and save it to the post
import {useSelect, useDispatch} from "@wordpress/data"
Now we’ll go ahead and actually register the sidebar and return a PluginSidebar component with our latitude and longitude text fields:
registerPlugin('fsd-sidebar', {
  render(){

    return <PluginSidebar name="fsd_sidebar" icon="location-alt" title="Geopoint Options">
      <PanelBody title={__("Coordinates", "fsd-gp")}>
        <TextControl
          label="Latitude"
          value=""
        />
        <TextControl
          label="Longitude"
          value=""
        />
      </PanelBody>
    </PluginSidebar>
  }
})
If you open up the editor now, you’ll see our sidebar is already working! Just click on the little geopoint icon to display it!
The inputs are not displaying real data yet though, let’s fix that.
first, add the following in the render function above our return statement:
    const {fsd_lat, fsd_lng} = useSelect(select => {
      return select('core/editor').getEditedPostAttribute("meta")
    })
useSelect takes in a function which it passes a selector too (I know a bit confusing). Within in this function you will return the data that you want access too.
It can be a bit tricky to figure out which stores and functions you need to call here to get the right data, but the WordPress documentation provides a good starting point to figuring out all the data available within useSelect.
In this case, we want the core/editor store, and then want to grab the “meta” attribute from it. We then can restructure our custom fields we created earlier from this meta object.
We can plug these values into our component:
<PluginSidebar name="fsd_sidebar" icon="location-alt" title="Geopoint Options">
      <PanelBody title={__("Coordinates", "fsd-gp")}>
        <TextControl
          label="Latitude"
          value={fsd_lat}
        />
        <TextControl
          label="Longitude"
          value={fsd_lng}
        />
      </PanelBody>
    </PluginSidebar>
What about actually being able to edit them?
useDispatch is the counterpart to useSelect. We can add the following above our return statement:
const { editPost } = useDispatch("core/editor")Here useDispatch takes in the store we want to access, then returns an object full of functions. We are destructuring editPost, so that we can call this when the input values change.
NOTE: This is editing the state of the post in the editor, it is NOT saving it to the database. That’s fine though – our data will get saved when the use clicks “publish” or “update”. We just need to make sure the state is up to date when that happens.
We can now update our component and use this function:
<PluginSidebar name="fsd_sidebar" icon="location-alt" title="Geopoint Options">
      <PanelBody title={__("Coordinates", "fsd-gp")}>
        <TextControl
          label="Latitude"
          value={fsd_lat}
          onChange={fsd_lat => {
            editPost({
              meta: {
                fsd_lat: fsd_lat
              }
            })
          }}
        />
        <TextControl
          label="Longitude"
          value={fsd_lng}
          onChange={fsd_lng => {
            editPost({
              meta: {
                fsd_lng: fsd_lng
              }
            })
          }}
        />
      </PanelBody>
    </PluginSidebar>
Nice!
If you open a geopoint post in the editor now you should be able to edit the lat and long values hit save, and they will persist on page refresh!
You can also double check your database and you should see entries at the very end of the postmeta table (this table gets really big, so you may need to jump to the last page):
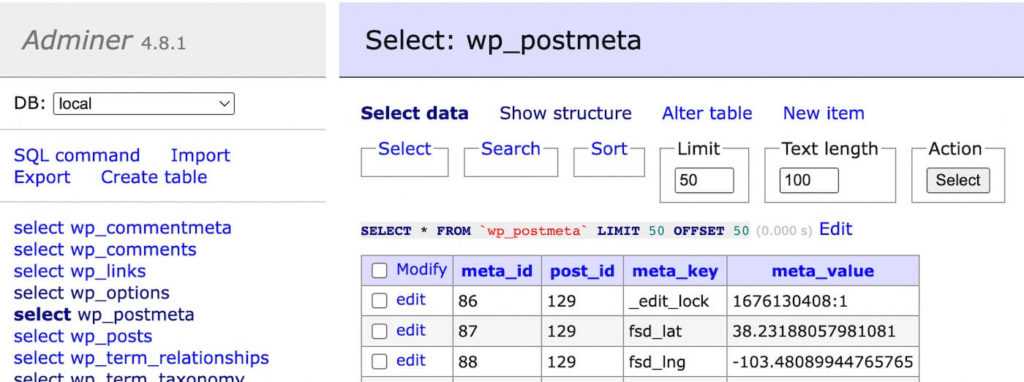
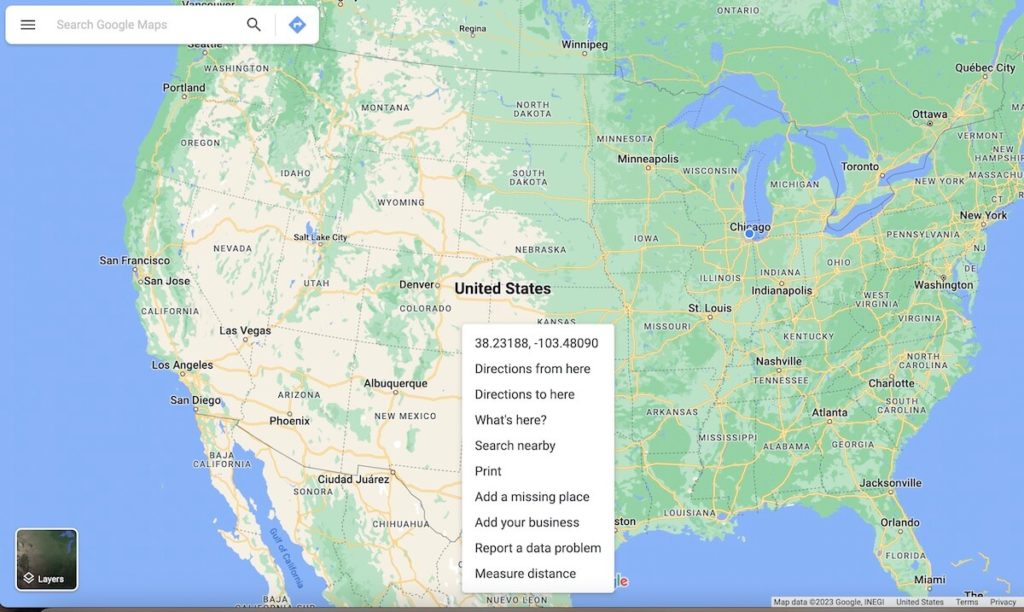
Go ahead and create a few geopoint posts and enter some real latitude and longitude values. That way we’ll have some data we can render later in our map block.
Quick tip – if you right click anywhere in google maps it will let you copy/paste the coordinates:
Creating a map block for the frontend
Congratulations! you made it through the main section of this tutorial!
You can now create custom sidebars for your post types and control metadata through them. This is a big deal – you are enabling structured data in Gutenberg.
Now we are going to shift gears to something more familiar, which is creating a custom block to display all our geopoints on a map.
Create our block files
We’ll need a handful of new files to create our block.
First, in the src/ directory add a folder called blocks and then a folder called “geopoint-map” inside of that. The structure is important because @wordpress/scripts by default looks for a “blocks” folder and then registers the blocks inside here.
In the starter files I have included a custom webpack.config.js file so that @wordpress/scripts will compile the blocks, in addition to the index.js file at the root of our source folder into separate outputs:
// webpack.config.js
import defaultConfig from '@wordpress/scripts/config/webpack.config.js'

export default {
  ...defaultConfig,
  entry: {
    ...defaultConfig.entry(), // compiles our blocks into build/blocks/*
    "editor/index": "./src/index" // compiles our sidebar script into build/editor/index.js
  }
}
Inside this new geopoint-map folder let’s add our block files. First add a block.json – this defines all the important block settings:
{
  "$schema": "https://raw.githubusercontent.com/WordPress/gutenberg/trunk/schemas/json/block.json",
  "apiVersion": 2,
  "name": "fsd-gp/geopoint-map",
  "title": "Geopoint Map",
  "category": "text",
  "description": "Adds a map of geopoints",
  "textdomain": "fsd-gp",
  "attributes": {},
  "editorScript": "file:./index.js",
  "script": "file:./frontend.js",
  "style": "file:./index.css"
}
A couple things you might notice, this block has no attributes! We could add some settings to it for defining the start center point, or maybe the type of map tiles (satellite vs road view), but we are keeping things simple.
The bulk of what will be going on for this block will happen in the “frontend.js” file that we define for the “script” property. Here we’ll run the javascript to actually initiate the map.
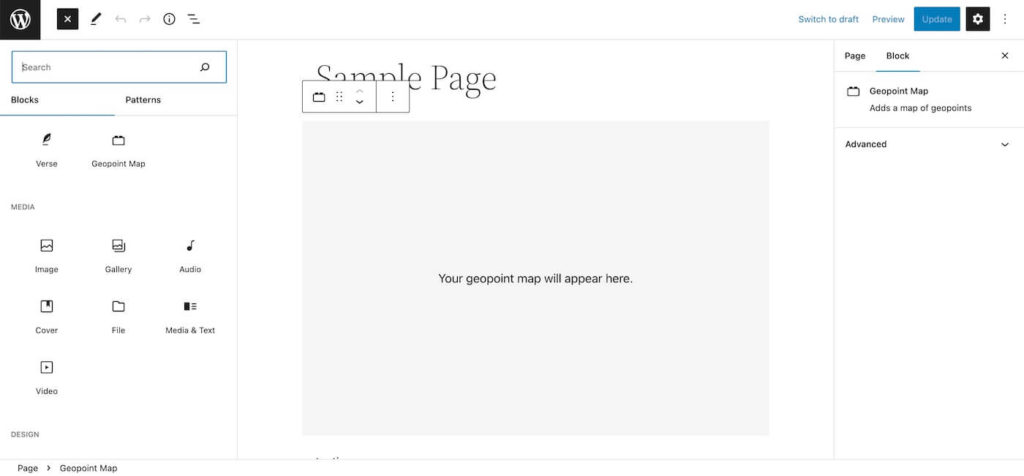
You could have the map render in the editor as well, but since this is really just an archive display of our geopoints without any additional configuration options I’m going to have it appear as a placeholder in the editor. This makes our next two files easy:
Add an index.js file to your geopoint-map folder – this is the editor script that registers the block in javascript:
import { registerBlockType } from '@wordpress/blocks';
import { useBlockProps } from '@wordpress/block-editor';

import './index.css'

registerBlockType('fsd-gp/geopoint-map', {
  edit() {
    const blockProps = useBlockProps({className: "geopoint-map-placeholder"});

    return (
      <>
        <div {...blockProps}>
          <p>Your geopoint map will appear here.</p>
        </div>
      </>
    );
  }
});
Next add the index.css file that gets imported above to style our placeholder:
.geopoint-map-placeholder {
  padding: 200px 20px;
  background-color: #f5f5f5;
  text-align:center;
}

#map {
  aspect-ratio: 16 / 9;
  width: 100%;
}
The css file is enqueued on the front end as well, so we can some styles that will affect our real map. Make sure you at least have an aspect-ratio or height property or the map will not appear.
Finally, create one more file called frontend.js, again this where the actual map building script will live. For now, you can just insert the following:
console.log("hello from frontend.js");Register the block
Our block is ready to go, now we just need to register it with PHP, so WordPress is aware it exists and enqueues everything properly.
Add the following in the main index.php file for our plugin:
add_action('init', 'fsd_register_blocks');

function fsd_register_blocks(){
  register_block_type( FSDGP_DIR . 'build/blocks/geopoint-map', [
    "render_callback" => 'geopoint_map_render'
  ] );
}
The register_block_type function takes a directory as the first argument and will look for a block.json file within this directory, then as a second argument we can pass an array of options. Since this is a dynamic block, we will add an option for render_callback. This is much like a hook: we just pass the name of a PHP function we will define that will return the block content.
At this point, you can open up your WordPress admin and open a page or post and you should see the block appear in the “add block” panel. You can add it to the page and see that on the backend it will just render a placeholder.
Right now if you save and view the page it will not display anything since we don’t have the render callback defined yet – Let’s do that now.
Map block render callback
Create a new file in our includes folder called “geopoint-map-render.php” and include the following:
<?php

function geopoint_map_render(){
  ob_start();?>

  <div id="map"></div>

  <?php return ob_get_clean();
}
This code is quite simple! we don’t need to handle attributes or anything like that, we just need a #map div to act as our entry point for our frontend.js file.
Unlike in template files, we cannot just echo out PHP. For render callbacks we need to return the html instead. In order to do this, we can use object buffering to drop out of php and create html, and then return it as one big chunk with ob_get_clean().
Javascript for the front end
Let’s get to the fun part and render out this map. We are going to use Leaflet as our mapping package. You could also use Mapbox or Google maps, but Leaflet is a great lightweight package that does not require an API, so we’ll stick with that.
First we need to include Leaflet’s css and javascript. Jump into includes/assets.php and add the following to register these external resources:
  wp_register_style( 'fsd_leaflet_css', 'https://unpkg.com/leaflet@1.9.3/dist/leaflet.css', null, '1.9.3' );
  wp_register_script( 'fsd_leaflet', 'https://unpkg.com/leaflet@1.9.3/dist/leaflet.js', [], '1.9.3', true );
Now we just need to actually enqueue them. We can just go ahead and do this within our main index.php file:
add_action( 'wp_enqueue_scripts', 'fsd_enqueue_scripts' );

function fsd_enqueue_scripts(){
  wp_enqueue_style('fsd_leaflet_css');
  wp_enqueue_script('fsd_leaflet');
}
Awesome, we are all set up to make the map!
Rendering our map
Before jumping in, you can take a look at Leaflet’s quick start guide – we’ll be borrowing our code from there.
Basically we need to target our div with the id of map and initiate a leaflet map, then we will loop over our geo point posts and create markers with pop-ups for each.
First, let’s just get the map to show up – add the following to your frontend.js file:
document.addEventListener("DOMContentLoaded", function() {
if(document.querySelector('#map')){
var map = L.map('map').setView([51.505, -0.09], 13); // default starting point from documentation
L.tileLayer('https://tile.openstreetmap.org/{z}/{x}/{y}.png', {
maxZoom: 19,
attribution: '© <a href="http://www.openstreetmap.org/copyright">OpenStreetMap</a>'
}).addTo(map);
}
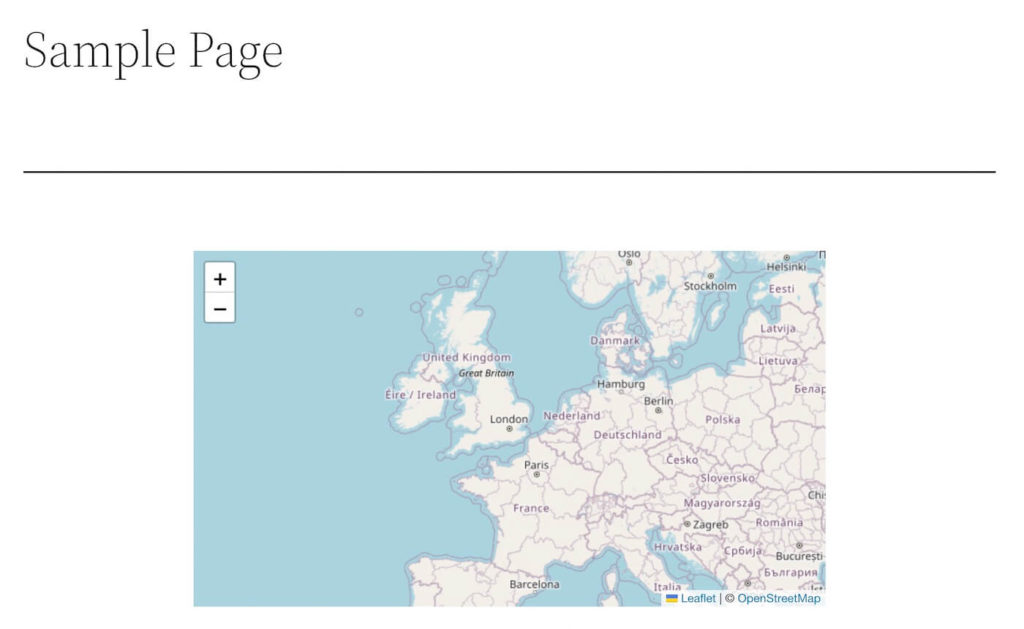
});If you save a page with the map block and view it on the front end of the site you should now see a map appear!
Pulling in our geopoints
Because we are in javascript land, we can’t use the traditional WordPress query loop to output our geopoints, this is where the Rest API comes in.
WordPress provides us with a very useful package for using the Rest API called @wordpress/api-fetch. Let’s import it:
import apiFetch from '@wordpress/api-fetch';This is just a wrapper on traditional “fetch” but it simplifies the code by automatically providing the base url, so we just add our endpoint specific path. Here’s what it looks like in action:
// IMPORTANT - don't forget to make this callback ASYNC
document.addEventListener("DOMContentLoaded", async function() {
if(document.querySelector('#map')){
const points = await apiFetch( { path: '/wp/v2/geopoint' } )
console.log(points);
// ... Rest of our map logic
}
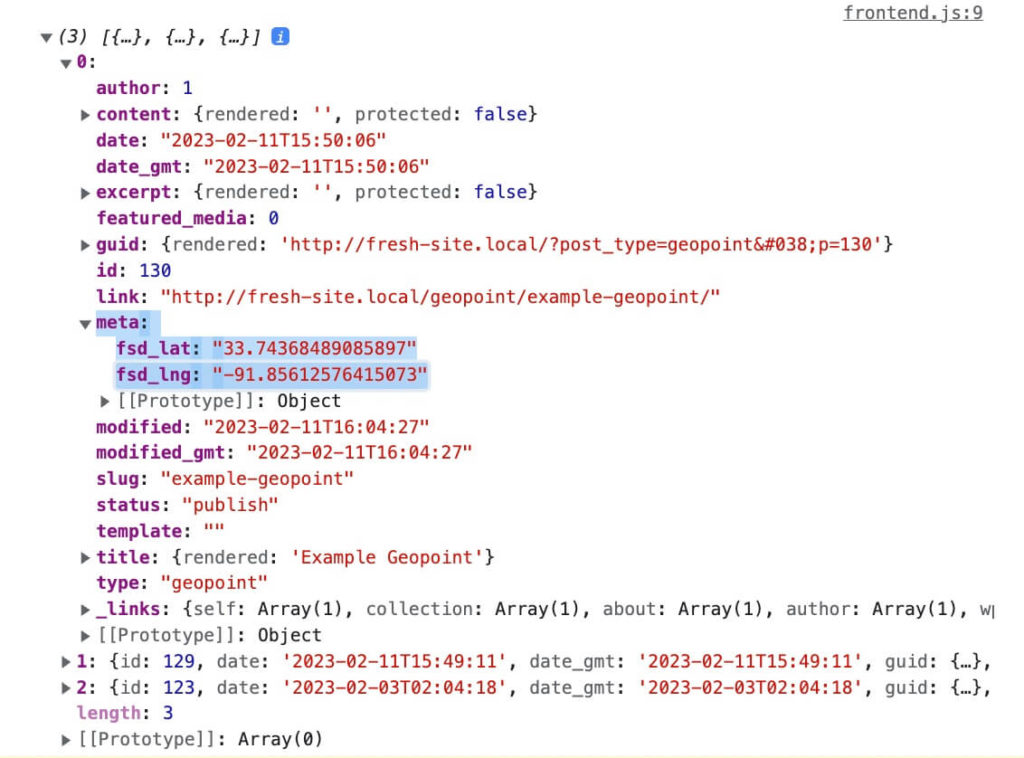
});If you refresh the front end you’ll see we’ve got our point data returned as an array, and it includes our custom lat and long metadata!
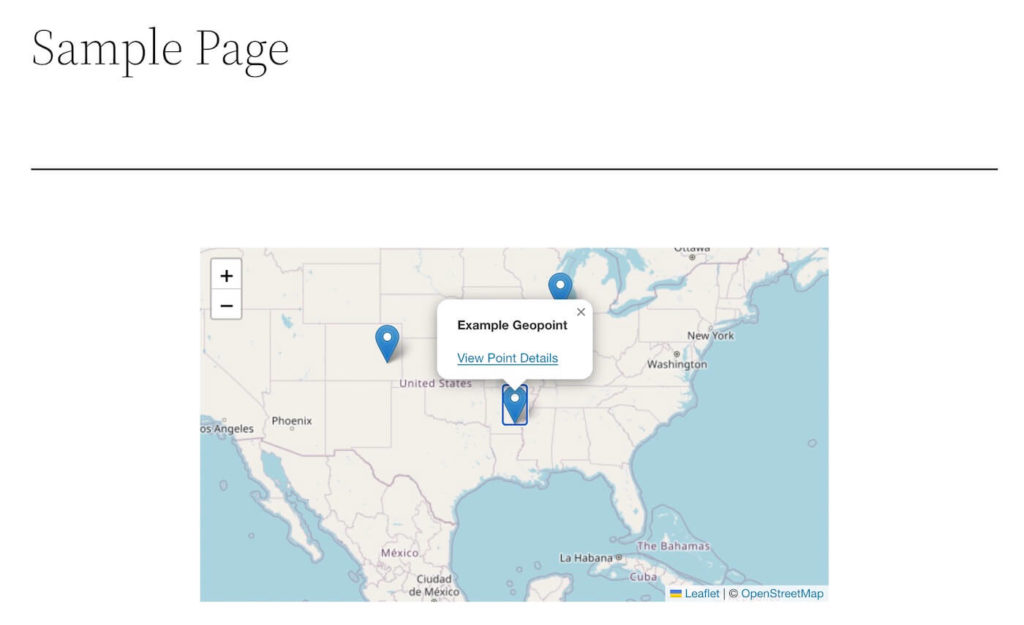
From here, all we have to do is grab the boilerplate for adding markers and popups from Leaflet and plug in our custom data – check it out:
document.addEventListener("DOMContentLoaded", async function() {
if(document.querySelector('#map')){
const points = await apiFetch( { path: '/wp/v2/geopoint' } )
// We are just centering the map on the first point here and setting it zoomed out to level 4
var map = L.map('map').setView([points[0].meta.fsd_lat, points[0].meta.fsd_lng], 4);
L.tileLayer('https://tile.openstreetmap.org/{z}/{x}/{y}.png', {
maxZoom: 19,
attribution: '© <a href="http://www.openstreetmap.org/copyright">OpenStreetMap</a>'
}).addTo(map);
// Loop through the points and create a marker and popup for each that links to the geopoint post
points.forEach(point => {
var marker = L.marker([point.meta.fsd_lat, point.meta.fsd_lng]).addTo(map);
marker.bindPopup(`
<p><strong>${point.title.rendered}</strong></p>
<a href="${point.link}">View Point Details</a>
`)
});
}
});That’s it! you could customize this further by including an image in the popup or even rendering different marker types based on a taxonomy, but the basic functionality is there!

Wrap up
Congratulations! This was a bit of a long write up to follow, but I hope this excites you about the possibilities of structured data within the Gutenberg editor.
If you ran into any problems feel free to check out the finished code.
Want to learn more about using meta data inside the block editor? Check out this new post all about creating structured template experiences using meta blocks.
Leave a Reply